Category Archives: Ms. Jenavieve

Choke cable and radio swap readying

The radio console is going to need to come out, which is fine because I need to pull the choke cable out too (the whole cable and housing is trying to move now, pretty sticky in there). Noticed it this morning when I drove her over for her new tires… if I pull the choke knob she chokes right up, but pushing it back in just moves the whole cable so the choke doesn’t open back up. Drove over idling at 40mph… lol

So, I went to O’Reilly and bought a universal choke kit for $10, pitched everything except the cable housing, and cut it to the proper length. Then I disconnected the cable at the choke (which moves fine by the way), pulled the cable out of the housing, removed the old cable housing all the way back to the dash, and replaced it with the new one. Pushed the old cable back through the housing (after greasing it up good), hooked it back up, and good as new.

The problem turned out to be that the housing was pulled off the mounting behind the dash… it was just sliding around with nothing to stop it from moving. The worst part was getting the old mounting point off behind the dash… because I got impatient and didn’t wait till this weekend when I was going to have the radio console off anyway, I had to assume the Lotus position and sneak an open end wrench up through to loosen the locknut from the back. Got it though after scraping my knuckles up pretty well. The new mounting is a lot smaller, but still fit fine in the dash opening, though I was ready to put a couple of washers in if needed.
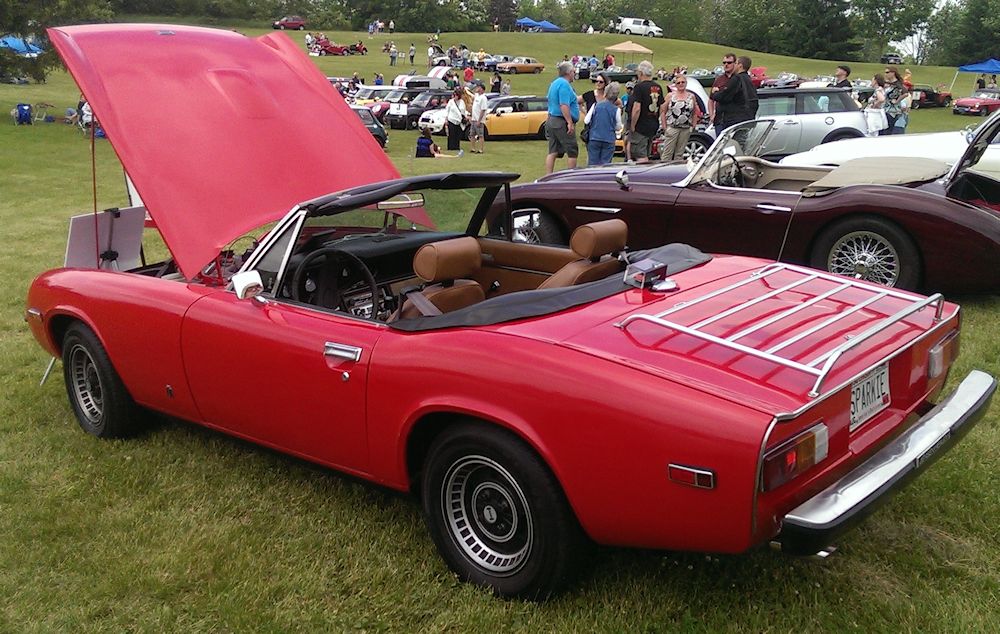
I can feel spring in the air, and…

Baby needs a new pair of shoes! Well, actually two pairs. My Kumho P185/70R13s are in, and will be installed tomorrow.

Also ordered the Retrosound Model One radio, which should be here by the end of the week. Between brake hoses and the radio swap, I know what I’m doing this weekend. Spring is in the air and I want to be ready!

Wondering what the trick to getting to the radio.  Can it come out the back of the console, or does the console need to be removed? I didn’t see any obvious screws holding it in place other than the two that hold the fresh air vent controls.

A (small) victory over Lord Lucas!

Ms. Jenavieve’s headlight switch hasn’t worked right since I got her. Same problem as outlined by others on the forum. Contacts were pretty burned up inside and the switch would basically fly apart if you looked at it wrong. Intermittent headlights aren’t a good option.

Anyway, was at True Value Hardware this afternoon, of all places, and they had a black rocker switch exactly the same size and style as the factory headlight switch. It’s only a single throw, but since I can’t imagine when I would want to have just the parking lights on, I spliced the blue and red wires together so that they all come on when the switch is on.

I also bypassed the dash light dimmer, since it has never worked right either. Even at full bright the dash lights aren’t exactly what I would call blinding.

$10 and an hour’s work. Not too shabby for lights that actually work when you flip the switch. One more thing crossed off the rapidly expanding to do list.

Lazy me

Well, here’s an update. My winter didn’t go quite like I expected it to. Crazy cold, too cold for the heat in the garage to compensate, and as a result not much has gotten done.

I’m rethinking the whole repaint idea for now, since once it gets nice out I’ll be wanting to drive her (other than cracking and bubbling in a couple spots, she looks pretty good from 20 feet away) so I suspect that the body work/paint may wait till after I’ve finished the mechanicals such as brakes and timing belt. And a set of tires… the sidewalls are pretty cracked on her current set and for what I can get a cheap set of 185SR70/13s for, I’ll invest in a temporary set so that I don’t have to worry about a blowout.

Winter is here, so…

Well, now that we had our first significant snowfall, I expect that Ms. Jenavieve will not be hitting the road until spring. We had nicer weather than I expected this fall and she got about 200 miles put on her just driving around the countryside… otherwise she would probably be farther along.

So, the project will be beginning. I’ll be starting small things first and then once we get past the holidays I’ll have more time to devote.

To do list as it stands at the moment, in no particular order:

NOW/SOON:

Spend a LOT of time with a sander. I want to take her down to bare metal to see just what I have to work with. The overspray that was done by the previous owner just isn’t going to cut it, and I’d rather start fresh.

Obviously, repair and repaint the body. So far it doesn’t look like I’ll have too much repairing to do… she’s actually in a lot better shape than I initially thought.

Replace front brake hoses that I got from Greg about 2 months ago and have been sitting on my workbench.

Replace all brake pads/shoes, just because now seems to be a good time to do it.

Replace timing belt, just because everyone says it’s a good idea. I assume I’ll need a new tensioner as well.

Find a replacement light switch (I’ve disassembled mine a couple of times and cleaned the contacts but it’s still “intermittent”).

Find a replacement tach… I assume mine is bad because I’ve checked the wiring thoroughly with my Fluke and everything seems to be as it should be. Still, no movement whatsoever on the tach.

Fiddle with the carbs to see if I can get her to start any more easily than she does now. A cold start is a 3 minute process these days, messing with the choke and getting her to run for a few seconds, stall, restart, repeat… but once she is warmed up she starts and runs fine.

CLOSER TO SPRING:

New tires. I’ll probably go with close to original (185/70SR13 or so) on the stock wheels. It’ll be nice to get a set of tires for what I pay for one tire for my Excursion. The tread is ok on her tires now, but I have no idea how old they are, the sidewalls show a bit of cracking, and for the ~$300 or so it’s a good investment. With the amount of driving she’ll get, new ones will probably last me 10 years.

And, just before spring, a Retrosound radio. Don’t need it yet, but it looks at least halfway period authentic for the car(other than the fact that it’s digital and has an MP3 port). I just need one that works, and it’s got that nice dual knob chrome look.

My goal is to have her back on the road all shiny and mostly new by next April. Once I get to that point, I can address the nitpicky points like new dash wood trim, etc.

Update… well, not really…

I haven’t done much of anything the past few weeks. The weather has been teasing me, being “almost” nice enough outside to drive her, so I’ve resisted starting any major work that would keep her in pieces for more than a day, but then the weather doesn’t get past the “almost” part and she ends up staying in the garage getting dusty. Once in a while I slide into the drivers seat and make a few “vroom vroom” noises.

The only thing that’s been done to this point was to introduce myself to the Lotus position to pull the tach out to check the wiring. It all seems good, there is 12v where I would expect, etc. and the car definitely won’t start with the tach out, so I assume that the wiring is as it should be. But it still doesn’t move. At this point I have to assume that the tach itself is bad. Any way to bench test one of these bad boys?

Once I’m sure she’s off the road for the year, the project will start in earnest.

Brakes working!

Worked like a charm. Reassembled the old caliper body with the removables from the new one. Ms. Jenavieve is drivable again. Drove around for about an hour today just because I could.

She is still pulling a bit when I brake, but not nearly as bad. I figure my hoses from Greg should be arriving probably Tuesday, and when I get them I will probably disassemble and clean the other caliper and replace the pads on that side, since I have them.

Having fun again.

Brakes continued…

OK, things are making more sense today. Turns out that the Spitfire caliper is not exactly the same. The mounting lugs are about 1/4″ closer to the caliper body than they were on the Jensen caliper. So, what was actually hanging up was the edge of the rotor.

Not to be dissuaded, I decided to disassemble the old caliper. After struggling with getting the pistons removed (compressed air works great to remove one, but then I had to figure out a way to seal the side I removed so that I could remove the other one) I took a good look at the inside of the old caliper, and it’s basically more dirty than anything else. So, I took some emery cloth and shined things up, and the inside of the caliper looks great now. The pistons look almost as good, and they all slide together nice and smooth. Thinking maybe what I will do tomorrow is disassemble the Spitfire caliper and swipe the seals and maybe the pistons to rebuild my old caliper myself, since I went this far.

Let’s get those brakes working, part deux

Well, this is interesting. I’ll be looking more into this tomorrow when I have more time, but the caliper replacement went way better than I expected… until the end.

Old caliper came right off. I was expecting to have to do a lot more persuasion on the mounting bolts and brake line nut than I had to. Everything loosened up nicely. Oh, and the caliper is seriously locked up. Couldn’t move the pistons at all, at least by hand.

Assembled the new pads in the new caliper, and slid it into place. Holding it in place, there was just a little clearance between the pads and the rotor… perfect! My troubles are solved, right? Well, not so fast. I inserted the bolts and tightened them finger tight… and the rotor wouldn’t turn. Scratched my head over this for a bit… checked the pads, not dragging. In fact they were rattling around a bit. Looked further into it and the outside edge of the caliper is tight against the rotor. Huh?

So I looked at it from the front, and I see that the rotor is not even close to being centered in the caliper. Well, that’s no good. Took it apart and put it together a couple of times, just to be sure I had it right (sheesh, it’s not that complicated) but all with the same result.

So, tomorrow I do a little more playing with it. Thinking about it, it’s not an issue with adding spacers to the caliper bolts because that will make it worse… it needs to move in the other direction, and obviously it can’t because it’s already tight against the mounting surface. Or, the rotor needs to move inward…?

Wondering if maybe it’s not a stock rotor? Too thick maybe? I’d guess it at about 3/8″ which from what I’ve seen in other posts sounds about right. Or maybe the mounting surface (didn’t peek back there) is bent somehow? I’ll be taking some very careful measurements tomorrow to investigate if there are any differences between the two calipers that would cause this, but I would guess that there is about 1/4″ of clearance between the caliper frame on the inside edge, and none at all (tight against the rotor) on the outside edge.

Really confused. More info after sleeping on it and looking at it again.

Let’s get those brakes working

The project inches along. Being in Wisconsin, I’ve got maybe a month at best of driving weather before winter gets here, so I set my goal of getting Ms. Jenavieve drivable for the short term (yes, she got a name). Talked with Greg at the JHPS store and he didn’t have any calipers on the shelf, so I found a cheap Cardone rebuild caliper to get me through for now (it’s actually specced for a Spitfire but supposedly it’s a direct replacement, sure looks like the same one). I did order new brake hoses from Greg since he had those in stock.

Assuming that all’s well there once I get these parts in, I’ll spend the next few weeks getting a little driving enjoyment and once winter comes, she will go into full restore mode. At that time, I’ll probably pull both calipers and send them to Greg to have them rebuilt.

I’ll get there.

Oh… and I *finally* figured out, after reading the manual, searching the forum, and looking at pictures… how to properly stow the soft top. It actually works pretty well if you do it exactly right. It almost looks like the picture in the owners manual, though my top is a little stiff so the “flaps” at the rear quarters don’t compress down quite tight enough to roll up super tight… but they do fit and I’ve got the cover nicely installed over the top. The trick, the part I had the hardest time understanding, is to drop the rear rail down behind the frame before rolling the top. You wouldn’t think it would be that complicated.