Started off Saturday afternoon *finally* getting around to installing the brake hoses I ordered from Greg last fall, along with the pads for the right caliper (the left side was replaced when I rebuilt the caliper last fall). Like everything else, it all ended up being more involved than I had hoped.
First, when I removed the right wheel I immediately saw that something didn’t look right. The pads were shifted slightly from their correct position and the top edge was actually riding “off the edge” of the rotor. Looking into it, the lower retaining pin was completely missing! Fortunately, I kept all the extra parts from the Spitfire replacement caliper I bought last fall for the left side (if you remember it didn’t fit right but I ended up disassembling it and using the seals and pistons to rebuild the existing caliper) and was able to find a retaining pin there. However, I didn’t have the little clips to hold the pins in place… more on that below.
While I had the caliper off I decided I might as well clean it up a bit, so I basically did a rebuild of the existing parts. Popped the pistons out using compressed air, pulled the seals, shined up the inside of the cylinders and the pistons with emery cloth, and put it back together. The seals all looked pretty good, which was fortunate since I didn’t have replacements handy.
The only thing missing at this point were the clips to hold the retaining pins in place (“retainers for retainers?”). The ones I remember from the left side were what I would call “hitch pins” for lack of a better name, kind of shaped like a capital R, with a straight part that fit through the hole in the retaining pin and then curved around to clip against the outside edge. Not sure if these were original, but that was what came with the replacement caliper last fall. Long story short… none of my favorite hardware stores stock such a thing in such a tiny size. What to do? I finally ended up just using a standard (albeit tiny) split cotter pin cut down to about a half inch long, and then carefully bent back around the sides of the retaining pin. It worked fine, but I will be cursing myself when it’s time to change the pads again since these are really going to be a bugger to remove again.
With the caliper successfully rebuilt and reinstalled, time for the new brake hoses. I only did the front, didn’t do the rear one. I’ll probably be cursing myself for not ordering all three. Anyway, that went pretty uneventfully.
By this time it was pretty late, so I knocked off and picked up Sunday morning after church. With all this done, all that was left was to bleed the system. So, armed with a quart of DOT4 fluid, off we went with the missus on the brake pedal and me on the bleeder valves. After almost a quart of fluid and an hour of getting the three bleed points at least close, we couldn’t seem to get all the air out of the system. So, I did a little online research, headed over to Harbor Freight Tools, and came back with a pneumatic bleeder kit (http://www.harborfreight.com/brake-fluid-bleeder-92924.html). Oh wow. I am never going to bleed brakes without this little gem again… best $25 I have spent to date. Took another quart of fluid, but we finally got them bled out properly and the pedal is nice and firm.
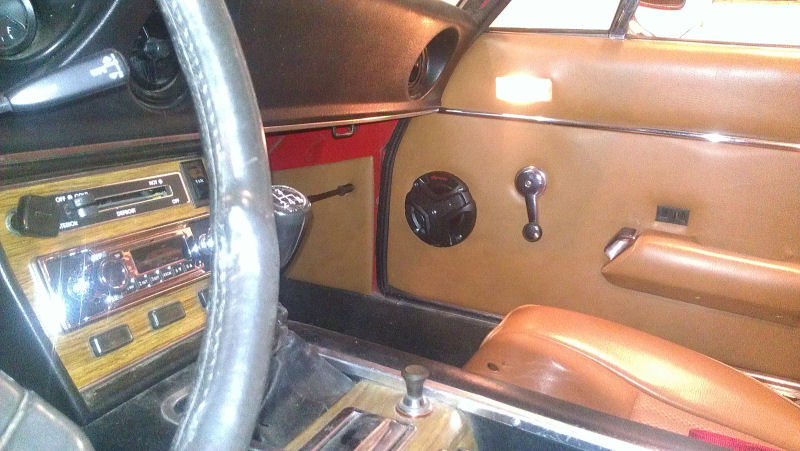
The rest of the day was preparation for the new Retrosound Model One radio that should be arriving tomorrow. Pulled the door trim panels off, and removed the incredibly crappy speakers that the PO had mounted in the doors… 3 1/2 inch speakers that didn’t even fill the opening. No wonder they sounded so rotten.
Then, tackled the radio console. Now, this didn’t quite go as I expected (actually easier if you can believe that). What ended up happening is that after removing the shifter/e-brake console, I removed the two screws holding the lower edge of the radio console down, and then removed the two screws that hold the vent handles under the dash in place. As Art suggested, there appear to still be screws holding the top edge of the radio console to the dash, but I could not find them for the life of me. Just for fun, I started pulling on the bottom edge of the console and the whole thing wiggled pretty well, but wasn’t going to come out. So I pushed it back into position… and the “woodgrain” trim plate popped loose. Ooh! So, I disconnected the choke cable to give me a few inches of give, popped the fan switch off, pulled the bulb assemblies from the 3 warning lights at the bottom, and was able to remove just the panel. Maybe this was the way it was supposed to come out, and I just misunderstood, but regardless I now had access to the front of the radio.
The radio was mounted to a plate that was held to the face of the console metal with 4 screws. Took them out and the radio came right out the front of the console. Easy as pie. Again, this may not be the original setup. I will get a couple of pictures of it all before I put it back together.
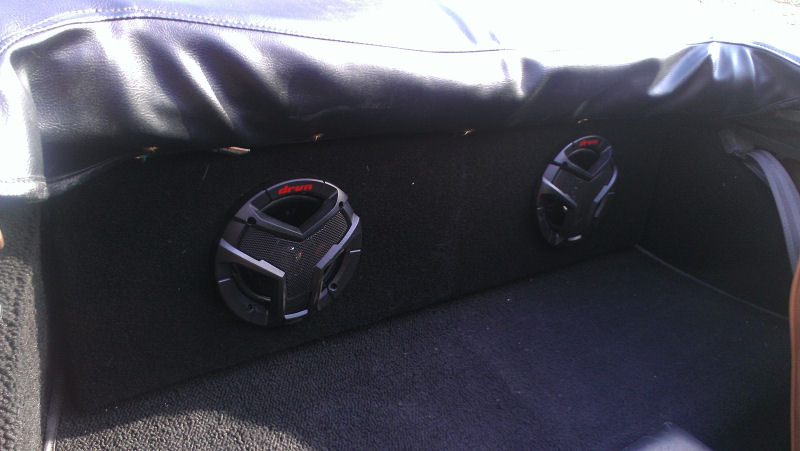
Today’s project is to run over to Best Buy and pick up some new speakers to be mounted tonight. I have picked out a pair of JVC 4″ coax speakers that look like they will fit into the door space. And, I am going to build a box for the 6 1/2″ Alpine rear speakers I will be picking up at the same time. A box that is 34″ wide by 7″ high by 4″ deep should fit nicely in the rear well under the rolled up soft top, covered with cheap automotive carpet. When it’s all said and done, I think it will be more a more than acceptable speaker setup for the space available… not audiophile quality, but more than good enough for me.
Bonus find of the day was a pair of cabinet doors (one of the neighbors must be remodeling their kitchen) made of 3/4″ plywood, 36″ high by about 12″ wide. Perfect material to make my speaker box, and the price was right.