Category Archives: Ms. Jenavieve

Leaks begone!

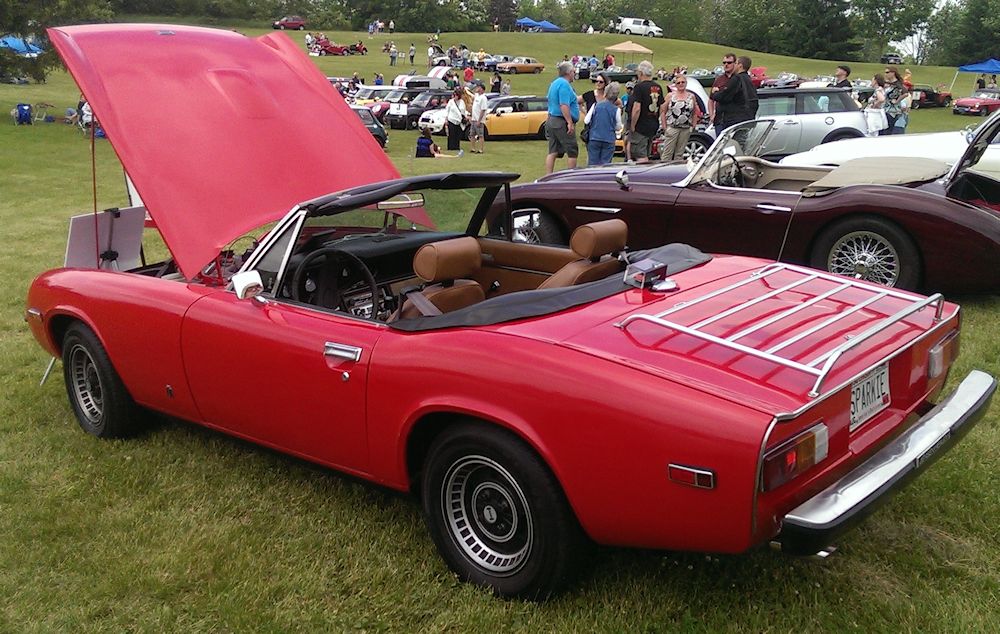
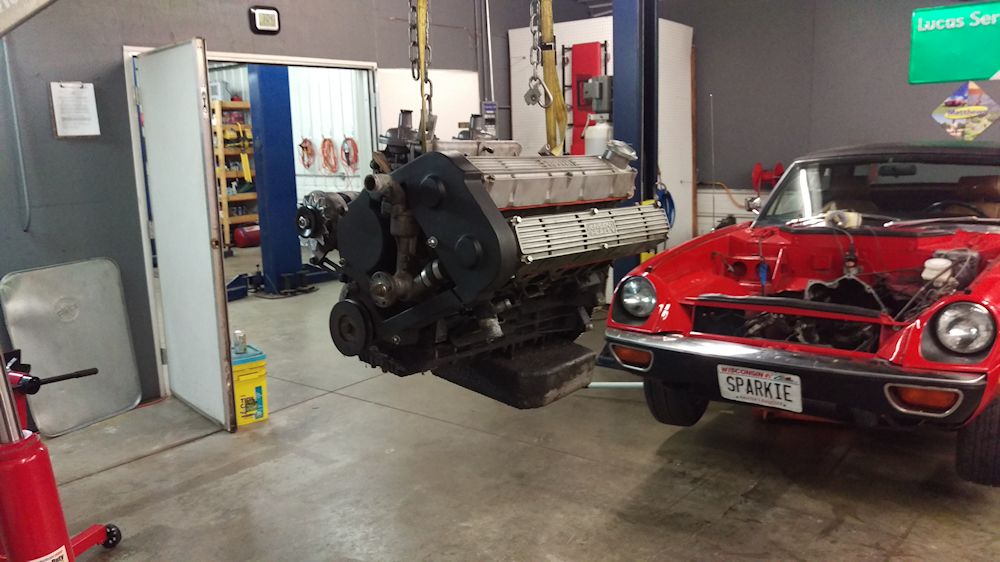
Ms. Jenavieve is off the road for the winter, and she’s in her winter home at our British car clubhouse on a hoist.  One of this winter’s projects: pull her engine for a new rear main seal and other general engine stuff.   Since she turned back to all zeros (apparently they didn’t plan on these cars going past 100,000 miles) I figured this was a good time to see what I can do about getting another several years out of her.

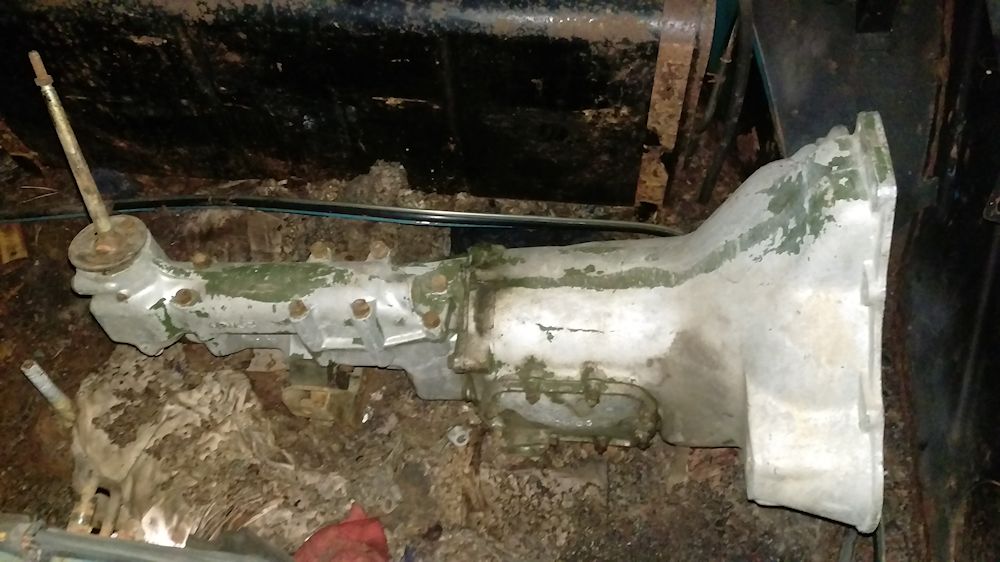
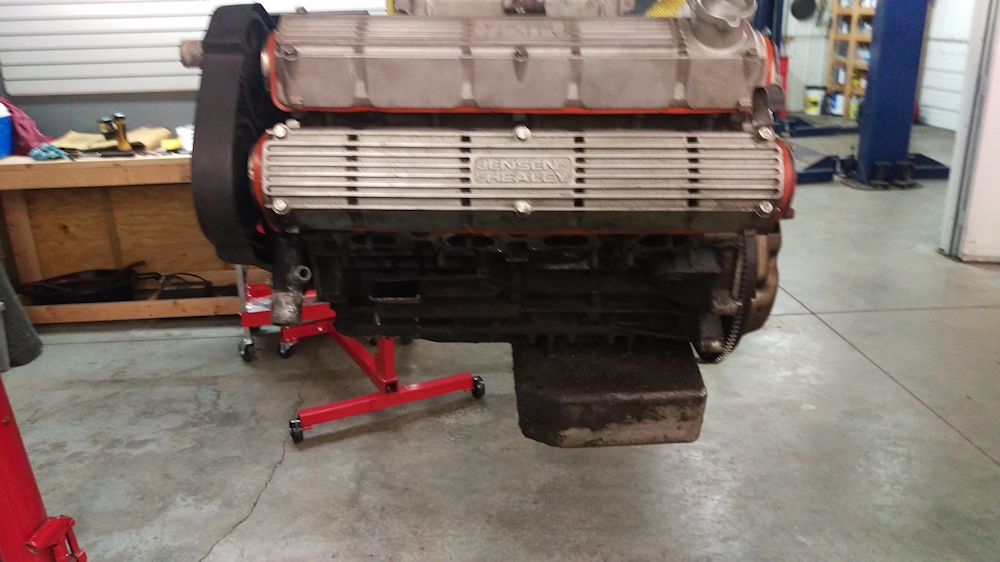
So, her engine came out last weekend without too much hassle and is now sitting on/strapped to a workbench I built just for the occasion, since it became pretty obvious that I wasn’t going to get at the rear main seal too easily while the engine was on a stand.

engineremoval4 engineremoval3 engineremoval2 engineremoval1

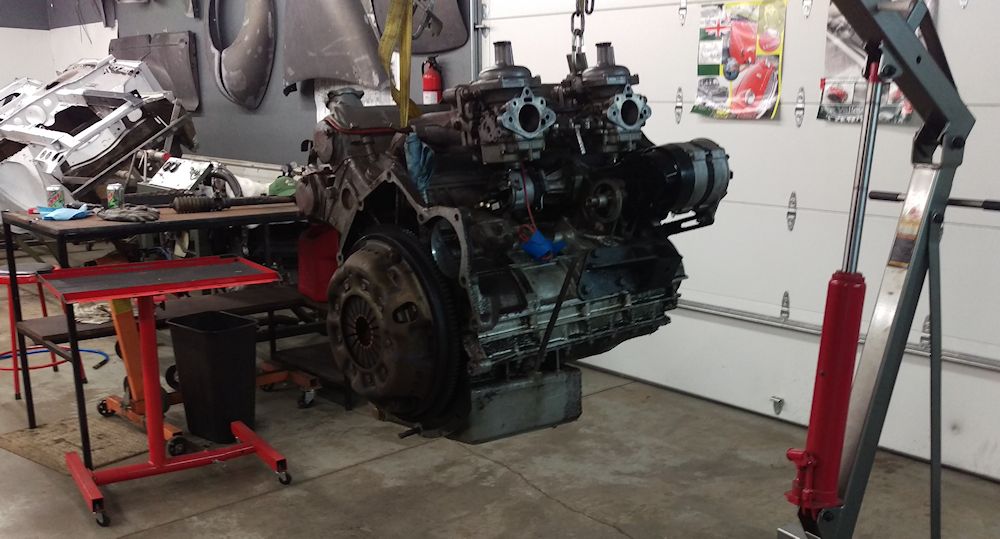
It’s a gunky, goopy, oily mess, as expected. The inside of the bell housing is covered in oil and gunk (though the clutch and flywheel are surprisingly clean). To pull the engine, the approach I took was to unbolt the exhaust manifold from the engine (MUCH easier when the car is up in the air on a hoist, I have to say) and then lift the engine up and out, leaving the manifold in the car (since the entire exhaust system is welded together, there was no easy way to separate the manifold from the rest of the exhaust). We’ll see how much luck I have getting it back together when the engine goes back in… I’ll cross that bridge when I come to it.

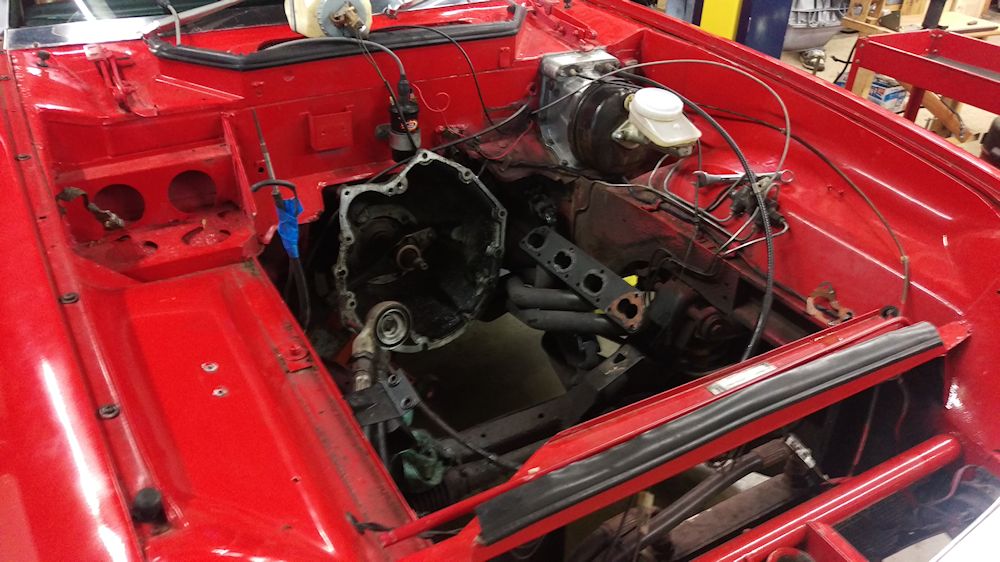
The first order of business was to wheel the picker outside with her engine swaying from it, to soak the engine in degreaser and power wash as best I could.  Once that was done, and after the clutch and flywheel were removed, onto the bench it went.

The short term goal at this point is to get the new rear main seal installed, and then I can put the engine properly on an engine stand for further work. To that end, I ordered the upper and lower gasket sets from Greg at JHPS today. I’m not convinced I will go far enough into the engine to need all of them, but if I ordered just what I thought I was going to use my luck would be that I’d miss the one that would hold up the project while waiting for it to arrive.

Wheel polishing and the zen of Jensen ownership

Well, after getting one wheel sandblasted to see how it came out, and realizing that I already had 4 wheels that were stripped of all paint when I got them (courtesy of Ernie West) I pondered different ways to refinish and polish the wheels.  A couple of guys from the JHPS forum suggested jacking up the rear of the car, starting it and letting it idle, and using the spinning of the wheel on the axle as a sort of “lathe” while holding the abrasive against it.

I thought about this, but all I could think of was the scene from Ferris Bueller’s Day Off involving a Ferrari crashing through a garage wall… and decided I wasn’t that adventurous.  In the spirit of Jensen ownership, it’s time to invent something!

So, I did a little Googling to see what others had come up with and combined various ideas.  Here is the result.  Parts list: one used treadmill with speed control, one used serpentine belt from a 1992 Ford F150 truck, one 5/8″ x 7″ bolt, one Jensen Healey front rotor with bearings, one 2×4, a couple of clamps, and various bits of hardware.

Worked out pretty well!  I started with 400 grit sandpaper dry, then 800 wet, 1000 wet, 1500 wet, and 2000 wet, and finished with Mothers Aluminum and Mag Polish.  I then spent about an hour per wheel with a can of flat black paint and a couple of brushes, and hand painted the black accents in.

During the process, I snapped this pic (at the time, two of the wheels didn’t have the black painted into the “roulette wheel” slots yet):

wheels2

And, here’s one of my finished wheels next to Ms. Jenavieve, so you can see the “old vs new” comparison:

wheels3

I decided to leave the “mag” part unpainted since I’ve never really liked the black on black look (there are slots there but you can’t see them well with the brake hardware behind them).  So, it’s not quite original, but I think they came out nice.  I still need to paint the inner rim (where the tire seats) as apparently they don’t hold air well if they are not painted.


Lucas… arggh

Not an intentional part of the project, but just when things are going well, Lord Lucas strikes again (though it’s technically a mechanical issue, not an electrical one).

Went to a car show about a half hour from home on Sunday, one of the typical shows in the area (meaning that if your car wasn’t built in Detroit, very few people are interested). Still, it’s a good way to kill a day. Anyway, as we arrived, I noticed a new, interesting, and not very good sound coming from under the bonnet. Consistent with engine speed, kind of a scraping sound. “This can’t be good”…

After we got parked and registered and all that, I popped the bonnet (because you can’t show a car with it closed, that’s just wrong!) and took a quick peek under there… didn’t see anything obviously amiss. After a couple of hours I decided to look further into it. Started her up, listened while walking around trying to pinpoint where the scraping was coming from, and zoned in on the alternator. Turns out that the alternator fan was just barely touching the alternator body. Hmm. Guess I tightened the belt too tight a couple of weeks ago?

So, now that I know the engine isn’t going to blow up, we enjoyed the rest of the show and then drove her home. Nothing out of the ordinary other than that scraping sound. Once home, I pulled the alternator out (it’s the Lucas alternator) and took it to the bench, and it appears that the shaft is slightly bent… there is a noticable wobble to the pulley and fan when they spin, though the bearing seem tight enough (which wasn’t what I was expecting to find, figured it was loose bearings).

Did a little forum reading, tried a couple of the shops like O’Reillys and Auto Zone, trying to find a single wire Delco 10si (since that seems to be the non-Lucas replacement of choice) with no luck. Then this morning, made a call to Mike at Delta just for comparison’s sake, and as luck would have it he had a Lucas 14037-HD, brand new, in stock. Apparently the “HD” means heavy duty, it’s rated for 63 amps instead of 43, but he found no reason that it wouldn’t be a direct replacement. So, I went ahead and ordered it along with a new plug kit since I haven’t had the original plug in years (I replaced the connectors right when I first got the car with crimp on female spades just to get her going) and should be back up and running later this week. Maybe the new larger capacity alternator will actually be able to keep up to the headlights.

New (old) switches for Ms. J!

I decided it was time to see about the rocker switches I recently pulled off of Blue J. I spent a few hours disassembling, cleaning, and reassembling the headlight, hazard, and fan switches that I pulled, and they are now in Ms. Jenavieve replacing the ones that were in there. None of hers were original: the hazard and fan switches were the squarer, sharp-edged replacements that Delta had a while back, while the headlight switch was just a SPST rocker that I found at the hardware store. Now they are back to original.

Next step is to see if I can rehabilitate the turn signal/wiper switch from the parts car (Ms. Jenavieve has the MGB turn signal switch) to get even further back to original… the switches seem to function fine as far as I can tell, but the mounting collar is cracked so I’ll have to see if I can JBWeld it or whatever. Oh, and I think the dash from Blue J will be going in as well (I really don’t like the Delta dash cap that Ms. Jenavieve has, and removing it is not an option since her dash is really in bad shape). The dash from the parts car has one small crack by one of the defroster vents but is otherwise pretty much perfect. No big hurry, though.

Steering and engine mounts.

After some time just enjoying the summer, got quite a bit done on Ms. Jenavieve this weekend.

First order of business was to revisit the whole steering shaft/motor mount issue from this past spring when I replaced her header with the Delta 4 into 1 header. I’ve never been happy with the way it turned out and since I had some time, I decided to take my time and try different approaches to get it right.

The problem was that when I installed the header, I could not find that perfect point where the steering shaft didn’t contact one header pipe or another where it passed through. It was hitting pretty hard on the right side at a half turn of the wheel, so I proceeded to make some shims out of large washers (notched to slide on easily) and shim the left side of the engine as suggested. Problem was, in order to get the shaft to stop contacting on the right side pipe, I had to raise the engine so high that the shaft started contacting the pipe to the left at about a quarter turn to the left, while just barely touching the pipe to the right.

Wow, that was hard to explain… but if you’ve done this you know what I’m talking about.

Anyway, at 9 washers (a little over half an inch of shim) I called it as good as it was going to get and that’s the way it’s been the past few months. The engine was way too high for my taste, in fact I had to remove the cam belt guard since it was hitting the bonnet. And finally, this weekend, I got back to it. This time I wasn’t in so much of a hurry (I had the whole header and exhaust issue to deal with back then) and I decided to take my time and explore all my options.

I spent a couple of hours pulling shims out, putting them back in one at a time, taking careful note of how it affected the steering shaft interference. What I finally figured out is that (and this was exactly the opposite of how I thought it worked) “shortening” the steering shaft (by collapsing the upper U-joint) actually gives the shaft less lateral movement. I thought straightening it out and making it longer would make it “smaller” in the turn radius, but that’s apparently not how it works at all. So, I loosened up the lower pinch bolt, slid the shaft to its “shortest” point, and it made a huge difference. I was able to go from the 9 shim washers I had all the way down to 4 (a little less than a quarter inch) and now there is no interference at all (though it’s still awful close). Much, much better.

Having done this, I reinstalled the upper cam belt guard, since it fits right now, and then decided it was time for an oil and filter change, which went as uneventfully as oil changes go.

So long, Blue J…

I’m getting pretty good at this disassembly process when it comes to Jensen Healeys, having done 3 of them now.  Blue J went off to the crusher yesterday, or what was left of her:

blueJafter1 blueJafter2

Not a whole lot left, huh?

But, the booty that was scavenged first will be useful either to me or someone else…

blueJparts1 blueJparts2 blueJparts3

Another British car show, can’t pass this up.

Ben and I drove across the state to the beautiful burg of Hudson, WI (way across the state, one mile farther and we would have been in Minnesota) for the Brit Fest Vintage British Car Show put on by the Minnesota MG group.  About 70 nice British cars, including another Jensen Healey!

hudson1 hudson2 hudson3 hudson4

Also finally got to meet and chat with Tim Engel, better known as the Lotus guru.  We were parked right next to his burgundy Europa.

Ms. Jenavieve has a new roommate.

So I was driving to a gig last week, and not really paying attention, and as I pass a farmhouse I see a glimpse of a familiar blue shape.  I think I can smell a Jensen Healey if it’s in the same county.

Anyway, after a bit of haggling, JH #12281, or most of her, is in my driveway on my trailer. 1973 JH Mk I. “Blue J” will be scrapped after removal of the few good parts.

blueJbefore1 blueJbefore2 blueJbefore3 blueJbefore4

No engine or transmission (actually there is a transmission in the boot, but I don’t believe it actually goes with the car since it looks nothing like the Rootes transmission and has MOWOG stamped on it in a couple of places).

mowog2

Quick research implies that it is an old MG Midget/Austin-Healey Sprite/Morris Minor transmission.  Nothing I can use.

Anyway, the rest of the car is exceedingly rusty. No floors to speak of, fenders are rusty in the usual spots, the bonnet is actually separated at the front. I was going to make the guy an offer for just the rear bumper (lots of surface rust but otherwise straight, including the stainless panel) and some electrical odds and ends, but decided just to bring the whole car home and remove everything of value, which isn’t a whole lot. The dash has one small crack and is otherwise good, the gauges all look good, the headlight pods are ok other than paint (they are the square bottom ones), the original rocker switches and turn signal and wiper switches are there, glovebox is good, and the seats are surprisingly good (just a separated seam on the driver’s seat) though they are black and I can’t use them in Ms. Jenavieve since she has a tan interior.

So, a couple of weekends removing stuff, and then off to the recycling yard she goes. If anyone is looking for Mk I “non-body” and “non-drivetrain” parts, ask since I may have something you can use. Otherwise I’ll just hang on to them for now.

Well. It’s nice when things work out the way you hope they will.

Pertronix shipment arrived from Delta this afternoon. After supper, went out to the garage and spent about a half hour mapping out “before and after” diagrams of the ignition wiring. I had to remove the ballast resistor and account for all the wires… it wasn’t too bad actually. I was able to remove the ignition feed wire (white/slate if I remember right) from the ballast resistor and just pull it over to the coil and connect it directly to “coil+” (SIDE NOTE: I rebuilt my tach to RVC standards with the Spiyda kit a while back, so I don’t have to worry about the infamous “my tach doesn’t work with Pertronix” issue).

This done, the old coil and ballast resistor were removed, and the Pertronix Flamethrower coil was installed. I had to wrap a few layers of rubber tape around it to get it to fit snug in the old coil bracket… I’ll find a more elegant solution later.

Then, I just taped and tied off the other wires for now since they aren’t being used for anything (I also installed a gear reduction starter last summer so my direct feed to the coil from the starter relay is nonfunctional… both ends of the white/yellow wire are disconnected), Connected the tach feed to “coil-” and considered the coil done.

Moving on, I turned the engine to TDC, pulled the distributor cap, and noted which terminal the rotor was pointing at, double checked the other end of the wire, and it was indeed #1. Numbered the plug end of the wires, and removed one at a time and installed them on the new Pertronix cap in the relevant positions. That done, and after a quick trip to O’Reillys to pick up a new coil wire (the Pertronix coil uses a regular push on connector while the old Lucas coil used a screw on) I was ready to start on the distributor. Unplugged the remaining wire (again not being used in the new system, the other end is tied off at the coil end), removed the retaining nut, and pulled the old Lucas distributor. Noted the position of the rotor, aligned the Pertronix rotor in roughly the same spot, transferred the mounting plate over from old to new, and installed the new distributor… just had to wiggle the rotor a little to get the shaft to seat in the oil pump housing. Tightened everything up, reinstalled the cap, pulled the plugs and gapped them to .035″, reinstalled them and commected the wires, connected the red and black wires from the distributor to the coil, and figured it was worth a try at this point since I knew the timing had to be at least close.

Connected the timing light, said a little prayer, and turned the ignition key. And… she started right up. Wow. I wasn’t expecting that. A little rough, but running. Checking the timing light, she was about 5 degrees ATDC, so I loosened up the distributor and got her set to about 14 degrees BTDC at about 1100 RPM idle. And, after tidying up a bit, took her for a drive for about 20 minutes, hammering her pretty hard, and not a single bit of hesitation. She’s never run like this.

So, after all of this, I just should have listened to everyone who said “ditch the points and go electronic”. I would have saved myself about a month of hassle, and the conversion was actually pretty painless. Of course, all the other stuff like carbs, plugs, air filter, etc. is now checked over so in hindsight it probably was a good thing that I went through all this troubleshooting.

Tomorrow, I’ll go back in and route the wires properly and figure out what to do with all the extra wiring that isn’t being used any more. And come up with a better way to mount the coil. Just happy to have Ms. Jenavieve running like she should again.

Waiting for Pertronix to arrive

Did a few more “just because” things last night just to further rule things out.

Pulled the filter element out (K&N element in the stock “muffler”), cleaned it, reoiled it, and reassembled. It wasn’t that dirty, and it had no effect as I suspected. I figured if it was too restrictive it could cause a rich condition, but no change.

Played with the Strombergs for a while. I didn’t adjust anything other than the idle speed since they were just balanced, but I did read up on their operation and ran a couple of tests to see what they were doing. I did the test where you lift the piston slightly and the idle came up just a little and then slowed right back down, so that seems to be good. I did notice several references to the piston having resistance on the up stroke but falling quickly with a “click”. Well, mine are definitely not clicking, but they do seem to drop fairly quickly. I’m not sure if that’s an issue or not.

Also (side note) I finally installed the replacement interior light I bought from Delta over a year ago… the reason I never got to it was because when I had the car disassembled for the repaint, I had left the driver side door switch hanging inside the hinge cavity when I removed the door, and completely forgot about it when I reinstalled the door, so it’s just been hanging in there for the last 16 months. Oops. Last night I removed the door, fished the switch out, and reinstalled the door and switch properly. Fortunately I didn’t have too much trouble getting the door to line back up, got it on the second adjustment.

Waiting for the mail to get here with my Delta package…