Author Archives: mallowguy

How to keep all these parts straight?

I thought I’d share an organizational idea I came up with during disassembly.

I went and got myself a couple of boxes of Ziploc storage bags, both the quart size and gallon size, a Sharpie, and a pack of index cards. Then, as I remove items, I put them in an appropriate size bag along with an index card stating where they came from. So, as an example, I have a bag with a card labeled “Front Left Fender” which has all the fasteners I removed, along with the side marker light. Another one labeled “Stainless Trim” with the screws from the door trim, the curved trim pieces from the rear of the car, and the little retainer clips for said curved trim pieces. Obviously, the larger parts don’t need to be bagged since they are quite apparent as to their identity, but the fasteners that go with them aren’t… hence the labeled bags. You get the idea.

I would hope that this will aid immensely in the reassembly portion instead of having a box filled with all the nuts and bolts that came from various places in the car all mixed together.

The disassembly begins.

The weekend passed and I actually got a lot done! Over Saturday and Sunday, my assistant (the 18 year old son who is anxious to start welding and is planning on this car being his someday) and I made a huge dent (pun not intended) in the disassembly process.

doorsetc011214
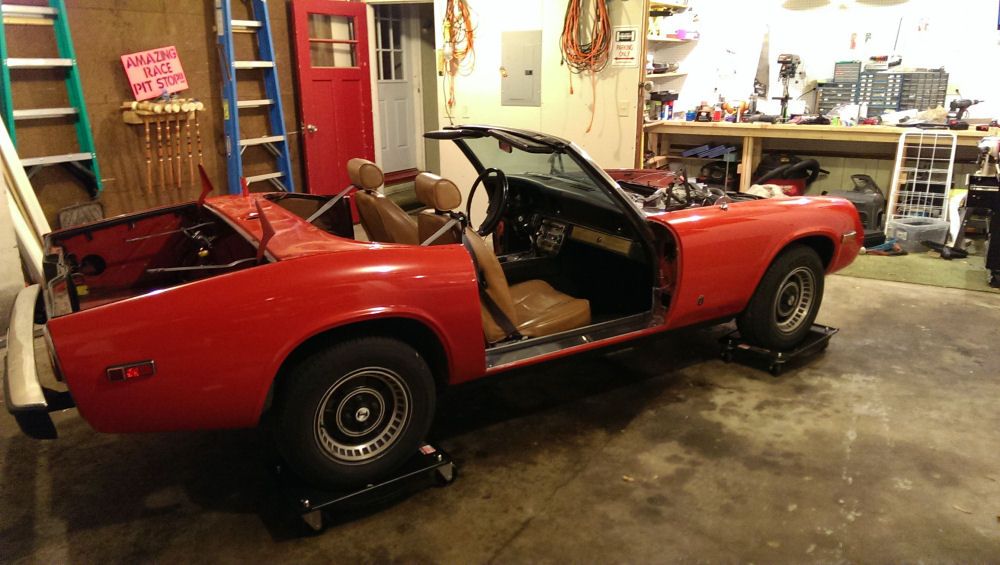
First order of business, after removing the battery, was to remove the doors, bonnet, convertible top, and boot lid. Then, off came the front bumper, and gas tank. That all went fairly quickly.

front011214
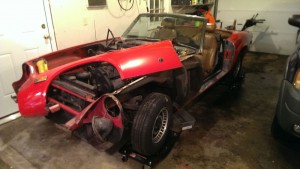
Then, since I had way more time to work with than I thought I would, off came the headlight pods, headlights, and the left front fender. Not bad for 6 hours of work.

I was pleasantly surprised with the condition of the gas tank (my guess is that my leak isn’t coming from the tank, but rather from the fittings and/or hoses) and the boot floor itself. Some surface rust, but it seems mostly solid.

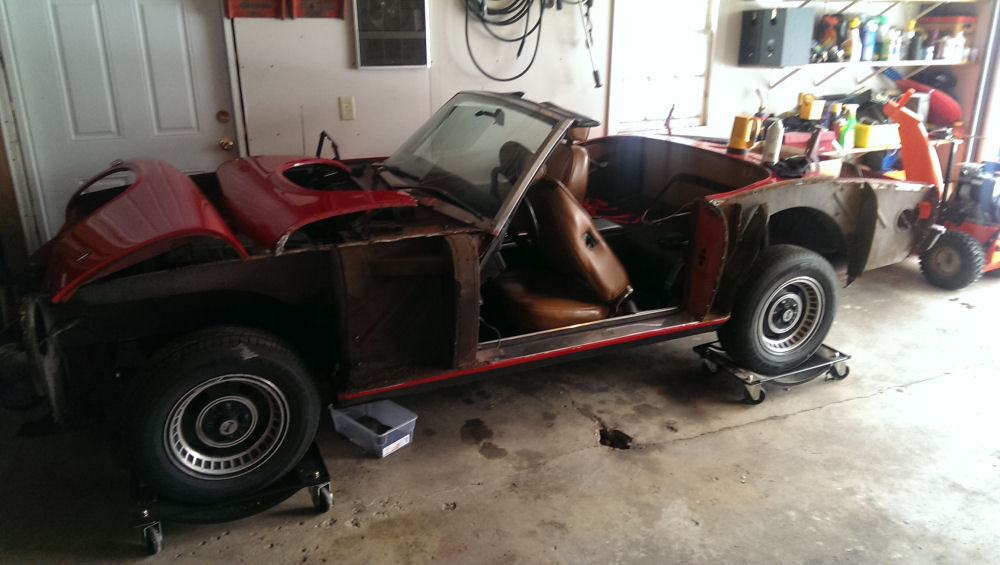
Sunday, I went back out and decided to tackle her again. Besides removing things like the hooks that hold the top down at the rear, all the snaps that hold the top in place, the taillights, the vertical stainless trim in the door jamb, and the curved trim pieces at the rear of the car, I also removed the left rear fender. Now, THAT was a job. I experienced my first significant rust along the way, and while I was pleased with the condition of the rocker/sill at the front fender (it’s actually quite clean) the condition behind the door is pretty atrocious. I was expecting the worst after seeing the bad Bondo job one of the POs had done, and I wasn’t disappointed.

leftremoved011214
In order to remove the rear fender, after removing the myriad of bolts and rivets (and having to melt the lead to get at a couple of the rivets), I ended up having to take a Sawzall to the fender in the little section in front of the wheel where it bolts to the rocker since the bolts were covered with about a half inch of Bondo. Once I did that, I was able to wiggle it off.

There’s basically nothing left to the top of the rocker in the area where the rear fender and the stoneguard attach. After chipping away all the Bondo, the center of it is basically a big hole. Next step will be to get the stainless trim off of the bottom of the door jamb (where it’s basically glued to the rocker) so I can assess just how far it’s rusted. I remember removing the stainless trim panel from my parts car and it was a hassle… not sure what they used to glue it down but it’s seriously strong stuff.

That reminds me… they used the same, or something similar, to seal between the top of the rear fender and the edge of the frame where the weatherstrip for the boot lid is. What is that stuff? Some kind of caulk? I found that heating it up only makes it even harder.

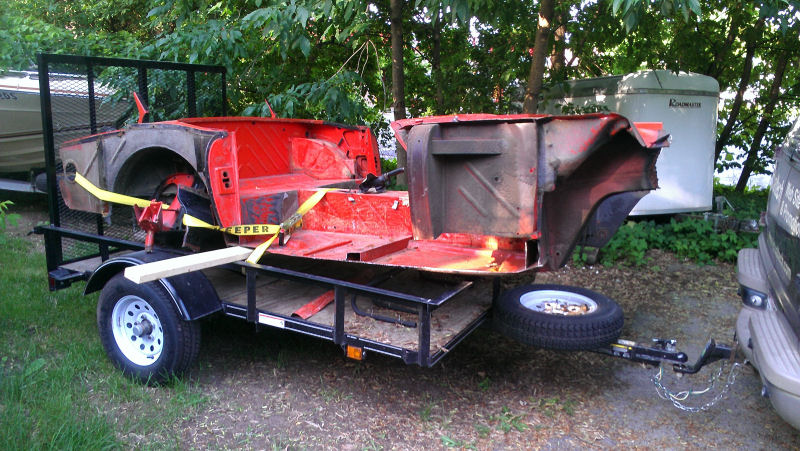
Anyway, a good weekend of work. Looking forward to next weekend when the other two fenders come off and I can finally assess just how much work we are going to have to put into fabricating metal patch pieces for the rockers.

No more excuses. Time to crack on.

New year, and time to get to it. I have 19 weeks to get Ms. J ready for the Jensen East 2014 event. Nothing like a deadline, right? I got a bit of a wrench thrown into things when I blew out my knee back in November and had to have it scoped, but I think I’m now ready to tackle the project in full.

Assuming the weather warms up some (if you haven’t seen the national weather reports, it’s crazy here… minus 21 degrees F at the time of this writing) my first goal is to get everything unbolted by this coming weekend. Doors, bonnet, boot lid, and fenders removed, and seats and carpet pulled. Garage is heated and insulated, but that kind of temperature is hard to overcome, so we’ll see.

Then, it’s assessment time regarding floors and rockers, once I have the above stuff out of the way. I took a look at the rockers from the parts car this weekend, and while they are pretty clean as far as rust, they are not exactly perfect (lots of little dings). Still debating if I want to go to all the trouble of using them, or just cut out what I need to cut out on Ms. J and weld in patch panels. Won’t know until I can see what I am working with.

Wish me luck.

Another summer comes to an end. So:

Well, it’s official. Ms. J is off the road for the winter (it’s 31 degrees F which works out to -1 C for those of you across the pond, and likely to get colder rather than warmer for the next several months) which means it’s time to start the restoration in earnest.

First order of business is to start prepping the panels I took off of the parts car I picked up from Ernie West earlier this year. Fortunately, those appear to still have the original paint so hopefully removal down to either bare metal or a good base shouldn’t be too much work. I’ll be replacing the front left, rear left, and rear right fenders, the boot lid (maybe, haven’t decided yet, depends on whether I want to go with or without the luggage rack she currently has mounted), and the rockers.

Looking forward to drilling out all those spot welds fastening the rockers to the inner sills. Since I’m not planning on replacing the sills, I just Sawzalled off the whole rocker and sill assembly from the parts car along with a bit of the floor pan, so those spot welds should be friendlier to drill out (I can just put the whole assembly on my workbench and use my drill press) though the ones on Ms. J will be fun. Is there such a thing as a portable horizontal drill press?

Once all that’s done, then I get to prep the rest of Ms. J. Lots more fun there. At least one badly done Maaco-style paint job to remove from the bonnet, doors, and other parts not mentioned above.

Not much to report.

Not much has changed in the past couple months, decided that this was the summer to rip the old wood siding off our house and replace it with vinyl, so that’s been taking most of my free time. 3 of the 4 sides (the complicated ones) are done, hoping to finish up the last side over the next couple of weekends.

The gas leak I mentioned above seems to come and go… I am writing it off to the weird changes in the weather we had all summer. My guess is there’s a tiny leak somewhere in the tank that is expanding and contracting with the weather changes. It’ll wait till this winter when the body comes off, and then I can assess the tank for repair or replacement.

On a side “fun” note (and I suspect several of you have been there) the first “oh you have a convertible!” moment happened this week. My son volunteered me to drive Ms. J in his high school homecoming parade with a homecoming court couple perched on the boot. So, that’ll be fun. Any excuse to show her off, right?

As soon as you clean up one puddle…

Another puddle on the garage floor. Looks to be gas this time *sigh*

It’s always something. The boot has always smelled like gas… my guess is with the crazy hot weather we’ve had the past week, things are expanding and opening a tiny leak into a small leak. Guess I’ll be pulling the gas tank for repair…

Brake problems solved… the donor car comes through!

Well, good news for a change. It was in fact the rear right brake cylinder spewing fluid at an alarming rate. However, I was doing some work in the garage and happened to glance over at the rear axle assembly that I removed from my parts car (and was too heavy to drag up to the attic) and lo and behold, the cylinders were still mounted! For some reason I had convinced myself that Ernie had pulled them (like he did the front calipers) before selling me the car, but there they were.

Pulled the right rear cylinder, took it apart and cleaned it up just to be safe, and swapped it out with Ms. J’s faulty one. After a quick power bleed, I can stop again! This parts car is starting to look like the best investment I’ve made in a long time.

More brake problems

Yup, brake problems indeed. Decided to drive Ms. J to work today for the first time in a couple of weeks, and the pedal is going right to the floor. Looks like it’s time to hit the club store for a new rear cylinder (unless I get lucky and it’s something silly like a loose fitting… haven’t gotten down there to look yet). Sigh.

And 19370 heads to the graveyard…

JJsFinalRide800
Donor car is gone. Got the sills and rockers removed and stored, along with the rear valance (or whatever it’s called, the rear panel that the taillights mount into), the rear axle and suspension, and what was left of the front suspension, and called it good enough. What was left was loaded by myself and my two teenage sons onto my little flatbed trailer and carted off to the local recycling center. At 7 cents a pound, this pile of classic British steel resulted in the recycling center handing me $23.80. Kind of sad…

The remainder of the summer will now be odds and ends that will keep her in driving condition (gotta drive when I can in Wisconsin, the season will be over way too soon) and getting the body panels from the donor car prepped for this winter’s transplant. Other than that, probably not too much work on her for a while, though I noticed yesterday that there is a bit of fluid leaking from the area of the right rear brake. It’s always something…

On the plus side, was vacationing with the inlaws this week in NY state and dropped in to visit Brett Gibson.  Had a great couple of hours chatting, sharing tips and getting insights, and looking over his JHs.

First car show!

The British Car Field Day was fun. Great weather, over 200 British classics on display. As expected, no trophies for Ms. Jenavieve. Actually, they didn’t quite know what to do with her, so they classed her as a big Healey. Take a look at this picture and tell me which car you would vote for… or which one not to vote for. Kind of unfair competition 🙂

healeyssussex800 msjsussex