Category Archives: Ms. Jenavieve

And the new header is in.

Wow, what a weekend (actually I started on Wednesday). Oddly enough, the removal of the old header and install of the new was probably the easiest part of everything I had to do, comparatively.

My earlier concern about the header not mating up to the engine block correctly turned out to just be a little misalignment of the studs, and a little work with a file in the header mounting holes solved that. Got the gaskets in and the header bolted up nice and tight. I was able to do all of it from under the car without the engine jacked up, though in retrospect I can see where that might have made some of it easier.

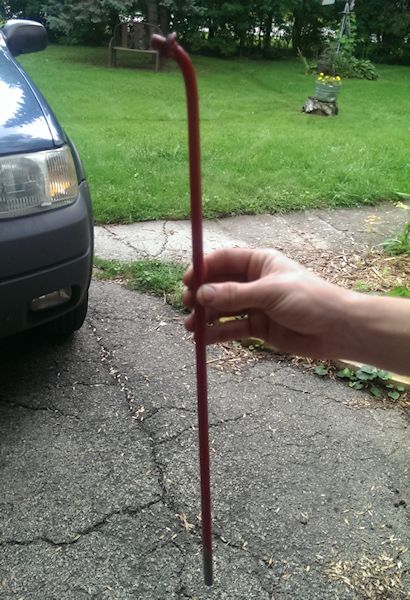
Anyway, the next step was to get the steering shaft back in. That was a battle, though not for the reasons other people have found. For the life of me, I could NOT get the upper knuckle to slide back onto the steering column shaft. It wasn’t an issue of not being enough room, it just wouldn’t go on. So I took the shaft back out, spread the coupling on the joint as much as I could in the vise with a hammer and chisel… still no go. In fact, I think I made it worse… it was slightly out of round. After fighting with it for too long, I finally just gave up, assumed the Lotus position, and removed the steering column so I could get both pieces on the bench and see what I was doing. After cleaning 41 years of grease, dirt, and whatever else out of both surfaces, and taking a needle file and sharpening up the splines, I got them to slide together nice and easy. Whew.

So, the column went back in, and under the car I went again, and this time the shaft went right on. Again, whew. From there it wasn’t too much of an issue to slide the coupling all the way to the firewall which gave me plenty of room to slide the lower end of the shaft back into the steering gear coupling (after cleaning that out as best I could with a toothbrush). This whole steering shaft issue was 4 hours I hadn’t planned on, but such is life with a LBC I guess.

At this point, I went back under and looked at how the exhaust (remember, I had a Delta performance exhaust installed last spring with the old header in place) was going to go back together. Well, that is another can of worms. Besides the fact that I have about an 8 inch gap between the back of the header and the front of the resonator pipe (still not sure why, they must have shortened that front pipe when they installed the exhaust to the old Y-pipe) there are alignment issues which are going to have to be addressed. I’ll come back to that.

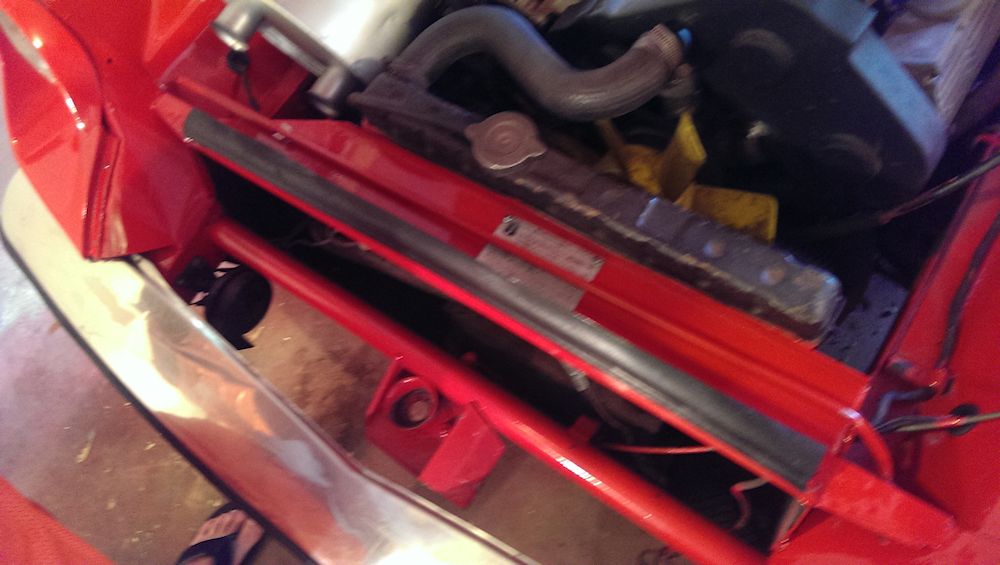
So, time to install the new motor mounts. That actually wasn’t too horrible. The left one came apart during removal, and the right one, while in one piece, looks about like you’d expect after being sprayed with oil mist for 41 years. Went to the hardware store and bought a handful of 1/2″ fender washers, each about 1/16″ thick, slotted them in the vise with a die grinder, and proceeded to install the new motor mounts, which went right in except that I had to jack the engine WAY up to get the shafts to clear the holes enough to slide them into place. But I got them in, and started the process of figuring out how many shims I needed to get clearance between the steering shaft and the header.

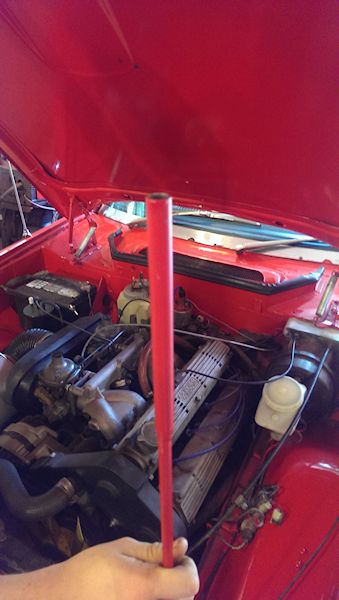
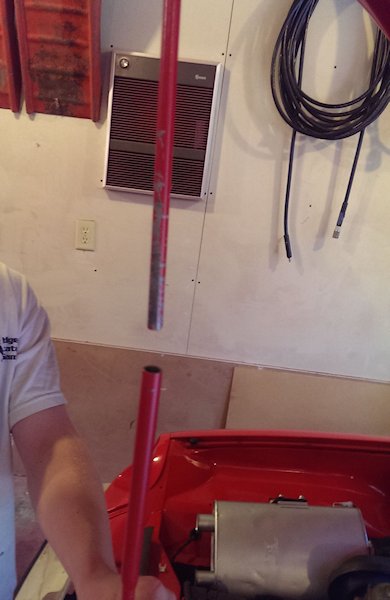
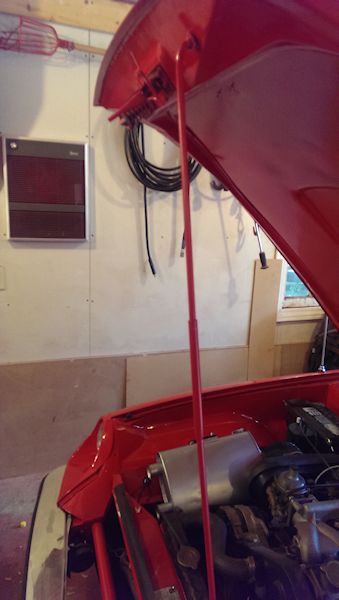
Oddly enough, I don’t see that the lower knuckle is an issue with clearance as others have brought up. It’s not even close to hitting the header. The issue I ran into was up higher, about a third of the way up the shaft, where the shaft passes through the header pipes. It was a very fine line between hitting the pipe either to the left or to the right of the steering shaft, but after a lot of trial and error I settled on 9 washers as being the optimal number of motor mount shims… about a half inch. Decided I was happy with that, tightened the mounts down, tightened the pinch bolts on the steering shaft couplings, and we’re all good there (though I am probably going to have to realign the steering wheel, I just kind of guessed and I’m sure it’s not straight). Won’t be able to verify that till the road test.

An aside at this point… if you remember, the DPO on Ms. J had installed the upper cam cover upside down (putting the oil filler at the front instead of the rear). Not sure why, but this now has to be addressed. Since I raised the engine with the shims, it appears that the oil filler cap is now going to contact the bonnet when it’s closed. Can’t have that. So, I just placed another order with Greg at the JHPS store (if I was planning ahead I would have done this last week when I ordered the header) for a new set of cam cover gaskets and the associated hardware. I’ll pull the covers off and put the top one on the way it’s supposed to be on, with the Jensen-Healey lettering right side up and the oil filler at the rear. While I have them off, I’ll see if I can clean and polish them up a little.

Anyway… back under the car. I think I am going to have to take her back to the muffler shop to have them address the exhaust. The issue is that the header is terminating a little farther to the left than the old one did, and as a result the Delta performance exhaust system isn’t lined up right. I kind of pulled it over to the header and put an intermediate pipe in, but it’s not straight and the resonator is pressed up tight against the bottom of the car (not into the transmission tunnel), in addition to falling off the hanger in front of the axle. I took some measurements and determined that I need an intermediate pipe between the header tip and the resonator end that has about a 2″ offset in it. It can be made to work, but it’s just another speed bump in this task. I’m probably going to just take it to the muffler shop and tell them to just do whatever they need to to make the exhaust all go together properly.

I do have to say that I did start her up, with the exhaust kind of cobbled together as I described above, and she definitely sounds different (a good different, I think). Can’t wait to hear how she sounds once it’s all properly together… all pipe from the engine back to the exhaust tips will be either new or less than a year old.

The light at the end of the tunnel is pretty bright, all things considered. At least the temperature’s not likely to get out of the 40s here in Wisconsin for at least the next week, so I’m not in a huge hurry, but I would just like to get this done, you know?

Old header out!

See, when you obsess about things they never turn out as badly as you expect. Ms. Jenavieve’s old exhaust manifold is lying on the garage floor in 4 pieces, and the whole removal process took less than 4 hours.

I experimentally took a box end wrench to the bottom left nut on cylinder #1, and was shocked to find out that it easily turned. No extra help required, no PB Blaster, nothing. I kept turning it and the stud backed right out of the block (with the nut attached). Easy as pie.

Encouraged, I tried the rest. Some interesting contortion involved, but I was able to remove all 12 studs with nothing more than a combination wrench and a socket with a long extension. And I didn’t even jack up the engine, did most of it either through the wheel opening or from underneath (other than two of the top nuts which were just plain easier to get at from above). All nuts came out with the studs attached. None broken (which was my greatest fear). Some were a little slow, having to continually flip the wrench and go about 1/16 of a turn at a time, but they all came out just fine.

Then, after a dinner break, I went back under with a Sawzall. Started by cutting both of the pipes right at the Y-pipe (which is still attached to the exhaust system, but since that was just clamped last year when I had the rest of the exhaust system replaced with the Delta performance exhaust) I don’t anticipate much trouble there. After cutting those two, I went back through the wheel well and cut #1 and #4 up as close to the bends as I could, pulled those off, and then cut #2 the same way. Then, I cut #3 very close to the mounting plate (found my leak, it was breaking off of the mounting plate). I was almost able to break it off by hand… ended up shifting what was left of the manifold around so that I could cut #3 off right at the mounting plate.

After all that, jiggered the mounting plate around (which had a few inches left of #1, #2, and #4 attached) until I was able to pull it out from underneath.

Didn’t even remove the steering shaft (though it probably would have made that last part easier). I figured since the header was going to be coming out in pieces, I’d wait to remove the shaft until after the header wasn’t in the way any more. Tomorrow, I’ll remove the shaft, unclamp and remove what’s left of the Y-pipe, jack up the engine and remove the mounts, and with any luck I may get the new motor mounts and 4 into 1 header installed tomorrow night.

I’m sure something will come up to complicate things, but at this point I have to say that this is going MUCH better than I anticipated.

Header time – I put it off long enough.

I seem to remember myself saying that I had the whole month of March to tackle the replacement of the old exhaust manifold. Ummm… March kind of went by without me noticing. Well, most of it anyway.

Regardless, on Friday I did go ahead and order (1) Delta 4 into 1 header, (1) gasket set, (1) set of new manifold nuts, (12) new exhaust studs, and (2) front motor mounts. Once I get confirmation from Greg that the parts will be shipping and arrive here on or before next Friday, next weekend is set aside for the R and R of the manifold.

Figuring that (again once I know the parts are on the way) I can spend an hour or two a day this week preparing… lots of PB Blaster, and a sharp new Sawzall blade or two. I’m pretty sure I have duplicates of all the wrenches needed, so if I have to modify one or two on the fly, I don’t have to wreck my “good ones”. If it all goes well, maybe I’ll have the old header out before the weekend and ready to install the new one. I figured I’d replace the motor mounts at the same time since I have to remove the old ones anyway (or at least undo them) and it seemed to make sense.

Wish me luck. I’m assuming I’m going to need it.

Getting ready for another spring, and more brake stuff

The last two weekends were productive (should have been just one weekend but I ran into a snag). Regardless, Ms. Jenavieve is now once again roadworthy, took her for her first drive of the year today. Not a terribly long drive since it only hit 49 degrees F today, which is really nice for early March in Wisconsin but not warm enough to be driving a convertible around 🙂

Finished up the removal of the painters plastic last weekend. It was actually fused around the water pump shaft. Ended up taking my Dremel tool with a little router bit on it to kind of drill into it and break through enough to peel it off, it was melted into what basically looked like a hard plastic washer. Anyway, that’s done and her fan is all cleaned up and put back on, alternator and belt are reinstalled, and ran her a little bit to be sure there weren’t any other gotchas. All good there.

Then, I tackled the master cylinder/booster replacement. This didn’t go quite like I planned since for whatever reason (as detailed in another post) the booster rod and clevis were not the right length, needing to be at least a half inch longer. I actually pulled the pedal box, took off the old booster, cleaned up the pedal box since I had it out, and then reinstalled it with the new booster. It went in but I noticed that the pedal was somewhat “sunk” to the floor, and the shortness of the rod wasn’t even letting the pedal come back far enough to contact the brake light switch.

So, this weekend, I took it all apart again, determined that there was no way to adjust the length of the rod and clevis, and decided to just put the old booster back in since it appeared to be working fine before removal. I did have to dump about a pint of brake fluid out of it, so I’m hoping that the internals aren’t too damaged, but it seems to be working fine after reinstalling everything and mounting the new TR6 master cylinder. Brakes are nice and responsive again, and this should have solved my disappearing brake fluid issue.

We had our annual meeting of the local British car club today, so I brought the replacement booster along and the guy we call our “resident MacGyver” took it from me… he thinks he will be able to retrofit a longer clevis on it so that I can drill the pin point in the proper place. No hurry on it as long as the old one is working… chances are I’ll just stick it on the shelf and look at it again next winter.

On to the exhaust manifold… just have to force myself to make the commitment to order it and actually go through the pain of replacing the old one. Still a little on the fence, but I think I will end up doing it over the next couple of weeks.

She comes back home!

And Ms. Jenavieve is back home in the garage where she belongs. Decided that 4 months without her was long enough, and I’m kind of champing at the bit to start preparing her for spring. So, my wife, son, and I went over to the storage unit this weekend and brought her back home.

Couldn’t get her started over there, and with no light, no heat (it’s been hovering around 5 degrees Fahrenheit here the past week or so) and only the tools I bring from home, we figured it was easier to just tow her back home with a rope and my Expedition (the storage unit is only a block from home). That was a little giggly because as noted below, her brakes are at about 1% functional… if you stomp all the way to the floor, she slows but panic stops are not an option, so I was praying the whole way home that Mrs. Answerman wasn’t going to hit the Expedition brakes hard. Made it just fine though, at about 3 MPH.

Now that she’s home, the task list (notice I’m skipping #1, read further for why) for the next 6 weeks:

2. Fix her brakes. As detailed in another thread, she has a mysterious syndrome where her brake fluid just disappears on occasion… no puddles on the ground, but it’s going somewhere, and the consensus is that her master cylinder is leaking into the booster. So… did some ordering this week. New master cylinder arrived today, and I lucked into a “slightly used” booster on eBay that was apparently purchased as a temporary fix by the seller from the club store several years ago. He then had his original rebuilt, and decided to sell this one (it looks like the one Greg used to sell, the kinda gold colored one). The master cylinder looks easy enough, but the booster looks more complex. We’ll find out… it should be arriving this week.

3. Order and install her new exhaust header. Yes, I am going to tackle this thankless looking job. I’ll be ordering the header from the club store, along with the copper nuts and gaskets, and also new motor mounts since I’m in there and I am sure the current ones are trash. I have what I believe to be the stock header and it’s got some serious leak issue (and basically looks ugly, looks like a PO had done some welding on it). I’m giving myself a month to do the PB Blaster/wrench/swear/rinse and repeat process. Hopefully that will be enough.

4. Sand, block, and respray her bonnet. When I did the bare metal strip and respray last spring, I gouged up the hood pretty well and it’s visible through the paint. Going to take my time and get it right this time.

And that should be it other than the missing number, which I got halfway through tonight:

1. Finish unwrapping about 20 feet of painter’s plastic from around the fan and water pump pulley. Eesh. That was a mess (as explained in the previous post). We loosened up the alternator and pulled the belt at the storage unit, and got about 80% of it off, but the rest waited till we got home. At this point it’s about 98% removed, but there’s still some very tightly wrapped around the flange and shaft on the water pump. It’ll clean up with whatever I have to use to cut/scrape/burn it out.

It’s all worth it, though… so glad to have her back home, and ready to get her ready for spring!

Time for Ms. J to sleep for the winter.

Well, Ms. Jenavieve is off the road for the winter. Last week I walked out in the garage and thought “ok, I am not going to realistically drive her any more this year… why am I putting it off?” I do have some work to do on her before spring, but I figure I’ll probably wait till March or so to get started since it’s not the sort of thing where I need her in the garage for months (new exhaust manifold, and I want to sand her down some and respray to fix a few issues with the paint job I did last spring). Plus now I can finally put my Expedition in the garage, just in time to not have to scrape ice and snow off the windows in the morning.

Of course this simple little task didn’t go without a few little glitches. And these are not serious, just amusing. Had to share.

So, last Thursday afternoon I decided “it’s time”. Hadn’t driven her in a couple weeks, so when I started her up I was dismayed, but not terribly surprised, to find that I had no brake pressure. I obviously have a leak somewhere, but I have never found it. Anyway, with the pedal to the floor she does stop, so I figured “I’ll deal with it next spring”. The storage facility is only about a block away from the house, so I wasn’t too concerned.

Drove her over to the storage facility, which is one of those “self-storage” places with lots of buildings (I rented a 10×30 stall) and a security fence… you punch in a keycode to open the fence gate to get in, and then you just drive up to the gate from the inside to open it to depart. This becomes important later in the story.

Being a LBC, of course she isn’t the neatest car in the world… a few drips here and there from various fluid reservoirs in the car. I had this bright idea to spread out a sheet of painter’s plastic under her to catch said drips. So, I pulled up to the storage stall, opened the overhead door, and drove in partway. Got out, got my roll of painter’s plastic, and unrolled about 20 feet of it and spread it out. The stuff is not much thicker than Saran Wrap, so it was an adventure to get it to lay down.

Having done all this, I got back in Ms. J, started her up… and as I slowly started to move forward the thought crossed my mind “I wonder if maybe it wasn’t such a good idea to drive…”

and at that moment there was a loud FOOMP

and the plastic was gone. Just disappeared. Already knowing what I was going to find, I shut her down, got out, and opened the bonnet, and of course found 20 feet of painters plastic wrapped around the fan and belt. Just like a big vacuum cleaner, that engine is…

(at this point I crossed myself and thanked the heavens for still having my cam belt cover installed, apparently I am like one of 12 people in the world who still has it). I don’t even want to think about how much of a mess that would have been if the plastic had gotten into there.

So, I made a couple of feeble attempts to pull the plastic out, realized that quite a bit was between the fan belt and pulley, and basically said “heck with it, I’ll deal with it next spring”. So, I pushed her back out a bit, put another piece of plastic down, and this time PUSHED her onto it. Which is what I should have done in the first place. I took the pieces that I had pulled out and wadded them up and shoved them into the steering wheel to remind me not to try to start her up again until I get the fan cleaned up.

Called it good enough, dragged her cover over her, walked out of the stall, closed it, locked it, and started the short walk home. Got to the security gate… and realized the flaw in my plan. If you remember, you need a key code to get in, and then you drive up to the gate to actuate a sensor to get back out. Well, that works very well IF YOU ARE DRIVING A CAR…

Shook my head, got out my cell phone, and called my son to come over and spring me from the outside. Sheesh. What a day.

Anyway, figured some of you could use a chuckle… and it’s all part of Ms. J’s story, so it’s now recorded here for posterity.

British Car Field Day 2014

Instead of working on Ms. Jenavieve, I finally get to reap some of the rewards in driving her and showing her off.  This past weekend took part in our second British Car Field Day in Sussex, WI. Once again, I was the only Jensen there (honest, I recruited people at Jensen East) but it was still fun, even though she got classed as a big Healey again.

susses2014closefront
From the front… lots of people stopped to (1) read the sign, and (2) ask why she had a muffler under her hood.  I told people it was a spare in case the rear one fell off 🙂

sussex2014closerear
From the rear, obviously.  Spent 6 hours the day before scrubbing down the orange peel with 1000/1500/2000 grit wet sandpaper, followed by a couple of grades of Meguiar’s cutting polish and finished with caranuba wax.  Did all but the hood (that has its own set of issues and I didn’t want to bite off more than I could chew that day).  Came out nice, in a way it’s almost a bit more authentic finish since I lost just a little bit of gloss overall.  Had a few people ask if it was her original paint.

sussex2014healeys
And the view of all her cousins.  Austin-Healey 100s and 3000s.  Obviously they got all the votes in the class.  It was fun just being there though.

IMAG0192
And one more view.   Actually, one of my best friends from high school dropped by so technically it’s not a picture of Ms. J, but of Ms. Tracy.  But Ms. J is IN the picture.

Custom bonnet (hood) prop

While I’m not tall, I do like to have as much headroom as possible when working on Ms. J. The factory prop (which was lying in her boot when I got her, which was probably a good place for it) doesn’t allow a lot of headroom. One of the previous owners had removed it and installed what looked suspiciously like a prop from a 1970s Ford Pinto… just a rod which was attached with a cotter pin, stored atop the radiator, and could rotate up to a vertical position to set into a hole drilled in the underside of the bonnet. While this solved the bent bonnet problem from the original prop, it still didn’t allow much more headroom, basically because the rod could only be “so” long to store across the radiator.

So, I had a brainstorm, and my son (the master welder) and I created a much improved prop. All it took was a length of round stock, and a short piece of tube stock, along with a couple of washers.

The pictures aren’t the greatest, but hopefully you get the idea…

hoodprop1
First order of business was to custom cut and bend a new rod, similar to the “Pinto” one she came with.  You can see it in the pic, lying across the data plate, with a couple of bends near the end on the right so that it can “hinge”.  There is a washer welded about an inch from the end to act as a stop, with the remainder inserted through a hole in the sheet metal near the headlight and then held in place with another washer and a cotter pin.  The left end, you will note, has something else…

hoodprop2
With the prop in the upright position, you can see that we welded a short piece of tube stock to the end of the rod.  For quick “under the bonnet” jobs, this is all we need as the end of the tube can just be inserted into one of the recesses in the underside of the bonnet.  However, for more room…

hoodprop3
… we need an extension.  This is another piece of the same rod stock, with a bend in the end and another washer welded to it…

hoodprop4
… which inserts into the tube at the end of the prop…

hoodprop5
and into a strategically drilled hole on the front edge of the bonnet.

This makes working on Ms. J’s engine much more pleasant.  Lots of headroom, and it’s not in the way.  While it’s a small chore to use (for now the extension sits in the boot… looking for a couple of clips to clip it under the bonnet) it’s quite functional and easy to work around.  And again, I don’t “have” to use the extension if I just need to do something quick.

Now I can put my 4 foot level away… which was my “temporary” prop while I was working on the restore.  No more broom handles, either!

Jensen East 2014

Our first Jensen East meet, and the planners thoughtfully situated it in Monroe, WI.  Only a 3 hour drive from home.  We couldn’t very well NOT go, right?

jenseneast20144 jenseneast20145 jenseneast20146
Ms. Jenavieve in her first all-Jensen car show.  How exciting!

jenseneast20142 jenseneast20143
Of course there was much more Jensenia to view.   Beautiful day in downtown Monroe, WI.

jenseneast20141
I just like this picture.  Everyone’s parked for the final night banquet.

And we are ready to rock!

All is well. Gas tank is no longer leaking, and she is deemed roadworthy.

Trunk carpet is in, hood prop is fabricated and installed (though I still need to pull it out to paint it… pics forthcoming when that’s done), drivers door is aligned (passenger side is still giving me fits), and I’ve put about 100 miles on her over the past week just because, well, that’s why I worked so hard on her, to enjoy driving her!

Now that the new exhaust is in, on the to-do list is to fix a leaking exhaust manifold issue (you can hear it much better now that the rest of the exhaust is good). After reading through the forum posts on that job, I may just see if I can live with it for now and deal with it next winter, because I don’t know if I have enough vino to cover the job.

Otherwise, at this point, all I have left is to try colorsanding and buffing her new paint to see if I can knock some of the orange peel down. I am probably going to have to reshoot the hood and the taillight surround at some point since I didn’t do a good enough job of prepping (I didn’t block at all) and some of the grinder marks are still apparent through the paint. Lesson learned… block sand EVERYTHING and have lots of light on the subject.

Ready for the Jensen East meet next week!