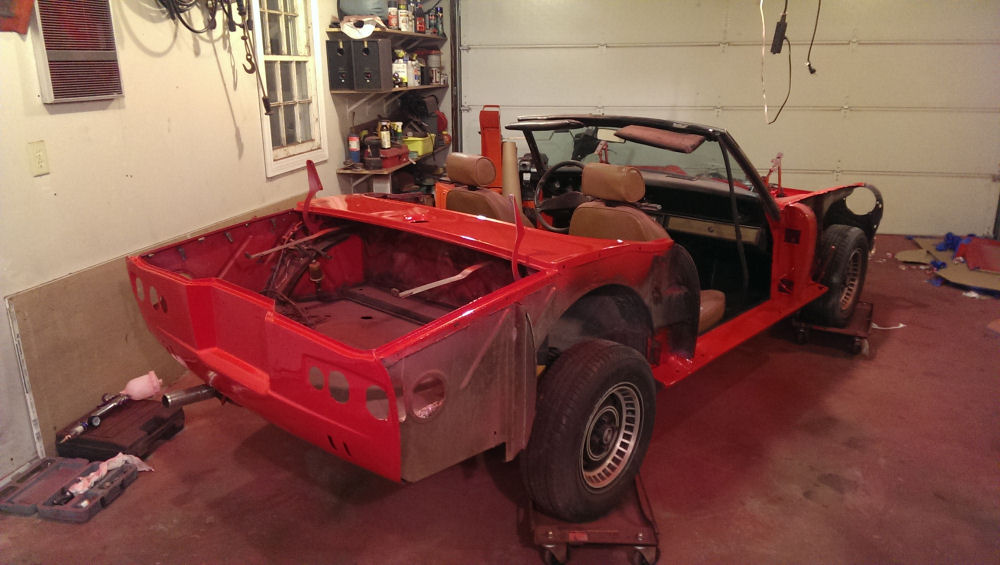
I’m calling the unibody done at this point, fenders and bonnet/hood are all stripped and ready to paint (once I repair a little Bondo work I unexpectedly ran across on one of the front fenders). Then, all that’s left is trunk/boot lid (should be simple) and doors (will probably be a pain). I did decide to paint her in stages and then reassemble the already painted panels. Planning on being uber careful when remounting everything, and if I scratch things up it’s my own damn fault (though I have to say that the urethane finish dries like a rock, not easy to scratch).
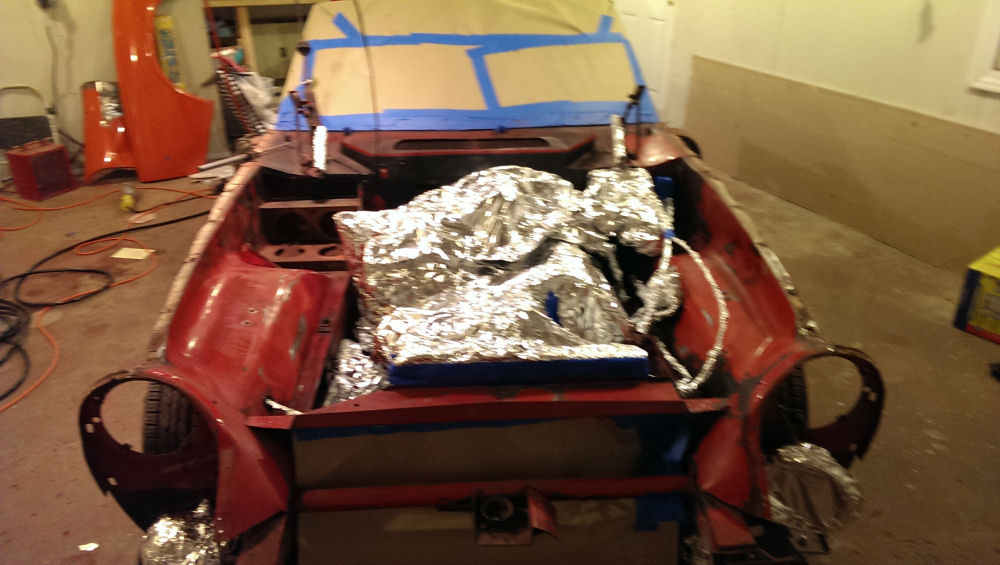
The engine bay, showing the deteriorated condition of the original paint plus what’s left of what appears to be a quick black overspray with Krylon. I’ve got things masked off with Reynolds Wrap, ended up taking it all off to redo after I stripped the paint (more on that below)
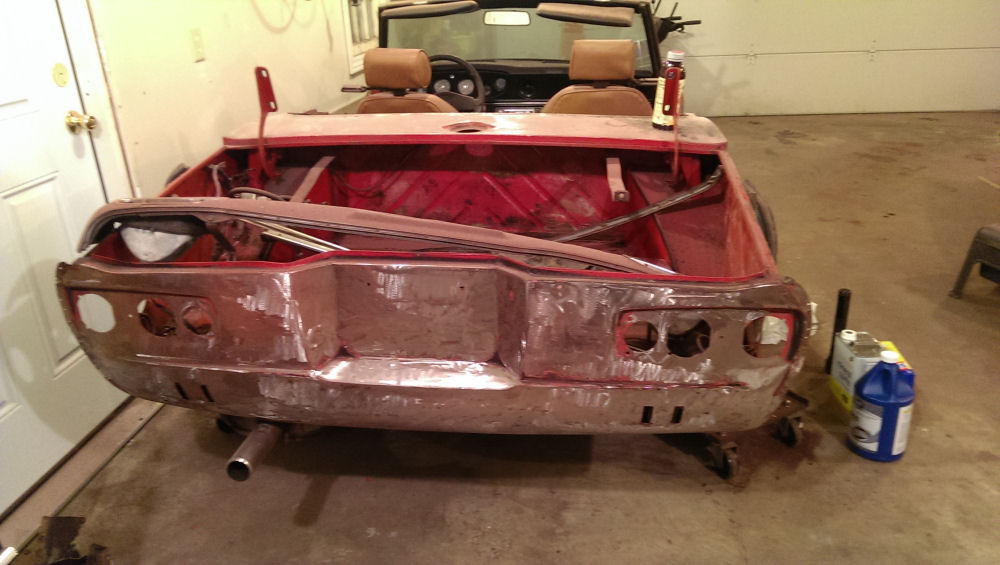
The rear valance and taillight surround with most of the old paint removed…
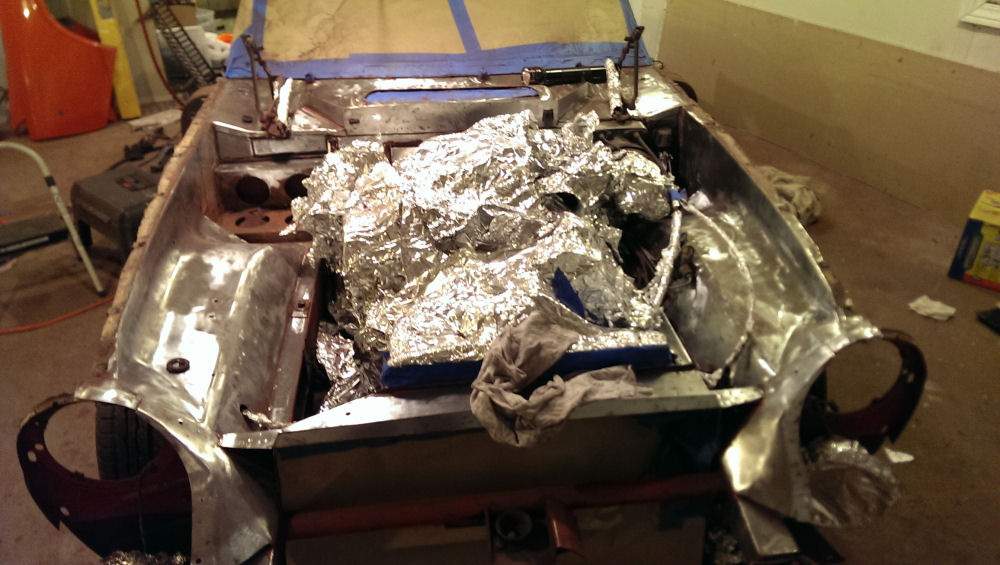
And then I proceeded to strip the engine bay. This was an adventure. Stripping wheels on the grinder and drill, and a tiny little flap wheel on my Dremel extension for those hard to reach places. Remasked with foil and ready to spray.
And finally, after 3 coats of PPG 2K urethane primer, followed by 4 coats of PPG Cardinal Red single stage urethane…
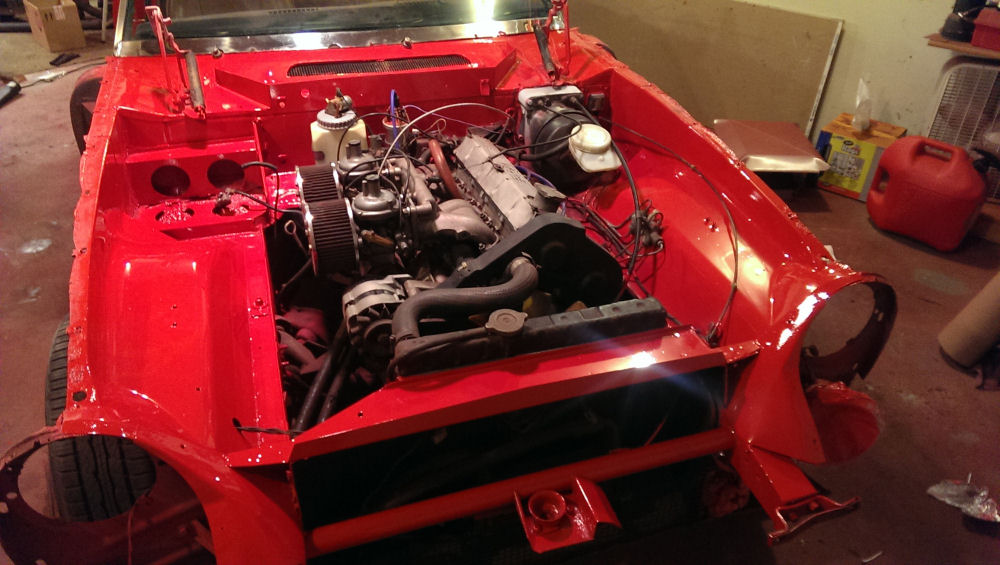
Quite a difference. This was my first time working with this type of paint. I have to say it goes on nicely, easy to work with, and cures to a rock hard finish. Of course, having the garage heated up to 92 degrees for 48 hours aids the process.

These bad boys are next up, stripped and mostly ready. I still need to do the Bondo work on the bonnet/hood and one of the fenders just under the headlight pod cutout. That should be done tonight, and the plan is to get them primed and painted before the weekend if all goes well.