Category Archives: Ms. Jenavieve

Vroom! New exhaust system! And… an oops

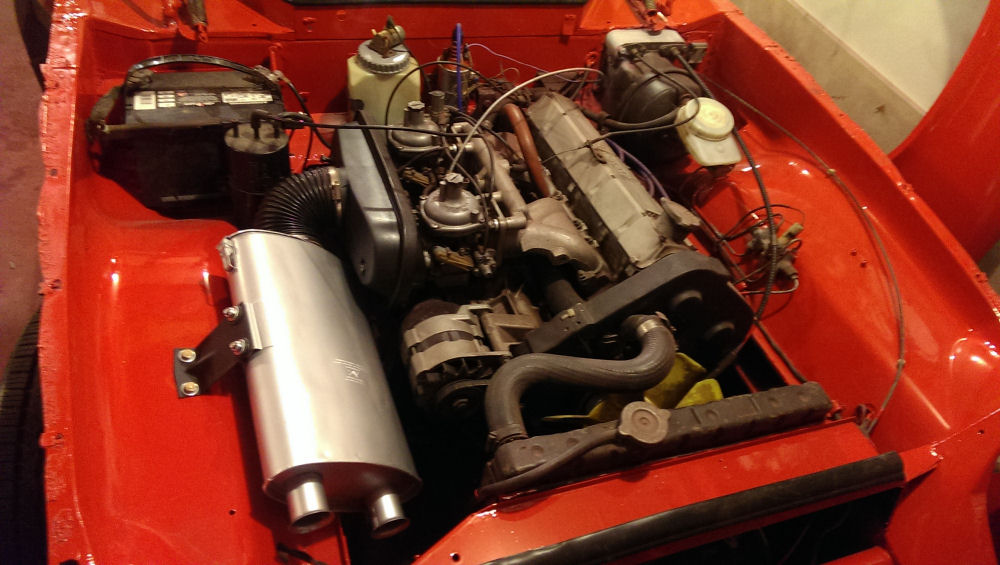
New Delta exhaust system is installed and she sounds FABULOUS! Went pretty uneventfully except that they had to weld one of the leaky front connections on the Y pipe (I still have the stock headers). Told them to go ahead since if I ever decide to do anything with it from that point forward, I’ll probably go with a replacement header anyway.

Then, the fun began. Had a little time last night, so I thought I would knock a couple more things off of my “to do” list. If you remember, when I got my fuel tank back from the radiator shop, the fuel sender float was taped to the top (apparently they must have knocked it off as part of the reconditioning process and didn’t bother to put it back in). So I decided to pull the fuel sender out of the tank so I could put the float back on and see if it made the fuel gauge work right.

The good news: her fuel gauge works now.

The bad news: along the way I had a bit of an ummm… mishap.

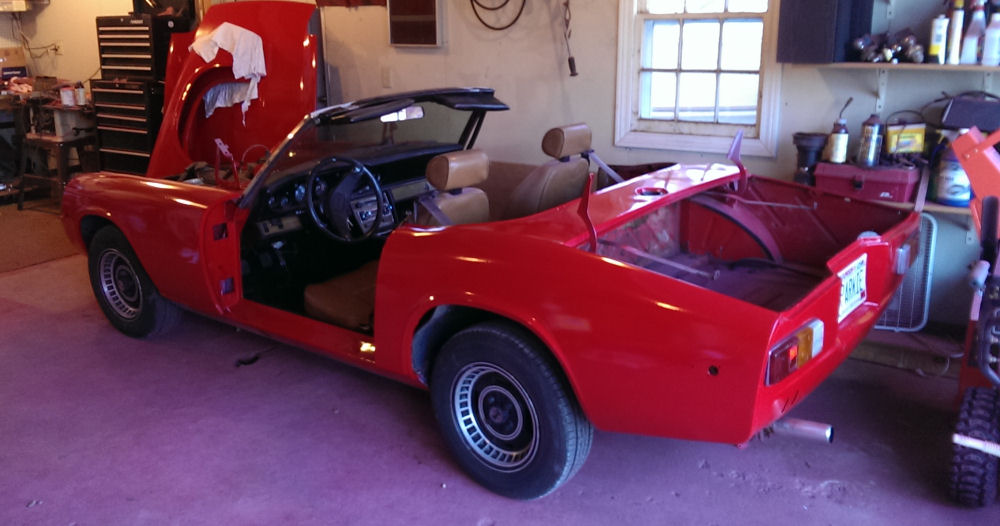
So, I pulled the gas tank out, took about 10 minutes. Getting pretty good at it (for future reference, I think I could pull the sender out without pulling the tank). Anyway, got the tank out, took it to the driveway. Undid the locking ring, pulled the sender out, pulled the sealing gasket out, snapped the float into the sender, put the gasket back in, put the sender back in, and put the ring on and tightened it up. Whole process took about 5 minutes.

Then, put the tank back in. Grabbed a 5 gallon gas can and went to the gas station across the street to get a couple gallons of gas (since I had to drain the tank before I did any of this, and I didn’t want to put that gas back in because the tub I drained it into wasn’t exactly clean). Got the gas, came back, put it in her tank… started her up… watched the gauge rise a little…YAY!

Then, I figured I would take her across the street to put more gas in. Did so, filled her up, and when I got done…

(here’s where it gets fun)

as I was hanging up the hose, I got a nagging feeling… “I probably should have checked for leaks before I filled her all the way up…”

So I looked under, and gas is streaming from under the trunk at a fair rate. Opened up the trunk and it’s basically filling up… eek! So… best I could come up with was to rush her back home (it’s just across the street), pull her into the driveway, go grab a couple of containers, and get underneath and pull the drain plug. Drained out what I estimated to be at least half, to get the level below the sender, and then put the plug back in.

Now I’m wearing more than a little of the gas, but at least it’s not leaking any more. Since the crisis was mostly averted at that point, I mopped out the trunk, hung the gassy towels outside to dry, went inside, showered, and had supper.

Afterwards, I went back out. By this time, things had dried out pretty well, so I pulled her back in the garage, got a flashlight, inspected, and as I suspected (and actually hoped), only 2 of the locking ring tabs were engaged. The third had… missed for lack of a better word. The whole ring was in at kind of an angle, so it wasn’t compressing the fitting against the gasket all the way around. I could see it wasn’t straight just looking at it. How I missed this the first time, I don’t know. So, popped it back off, straightened it out and spun it back on being much more careful this time to make sure it was engaged properly.

Whew. Crisis averted, though I think I lost about 2 gallons of gas during all of this. The remaining fuel that was drained out went into two gas cans, which means I probably won’t have to buy gas for the lawn tractor for quite a while.

I think it’s all good now, I didn’t fill it back up to find out yet. I want it to all dry up first. At least I hadn’t installed the new trunk carpeting yet.

Moral of the story: after working on a gas tank, check for leaks before reinstalling the tank, and definitely BEFORE you fill it up.

Roadworthy!

Even took her to the office today since my Expedition is off getting the air conditioning fixed.

On Wednesday, she goes to the exhaust shop to get her Delta performance exhaust system installed. Looking forward to hearing her growl instead of whatever the cheapy and rusted muffler she has now sounds like.

Otherwise, all assembled with just a few minor points to resolve yet:

– still need to reinstall the fuel sender float
– still need to replace the trunk/boot carpeting (the old stinks of gas)
– still need to work on getting the doors properly aligned
– still need to make my custom hood prop

Otherwise she is good to go! The last step yesterday was to run a half can of Seafoam through the engine oil and then change her oil and install a new oil filter.

Now if it would just stop raining…

She is so close…

Almost ready to go! Got the bumpers painted last night, and reinstalled all of the interior trim panels, handles, etc. (along with the left front stoneguard which I forgot to install when I did the others for some reason).

Tonight: put the bumpers back together and mount them, bolt the top back on, and she’s roadworthy other than all the stainless trim and JH badges, etc.

Also going to fabricate and install my custom hood prop tonight (came up with an interesting approach using something that will fit under the hood but still allow lots of headroom for working on the engine). About $6 worth of raw materials and an hour or so to make it. I’ll have pictures after it’s installed.

Running!

Gas tank is installed and NOT leaking (yay!) though the radiator shop managed to knock the float off the sender, so my fuel gauge isn’t working. Fished the float out of the tank and set it aside… I’ll deal with that presently. For now, I just want to get her driveable.

She’s basically together other than the bumpers, the inside trim (no door or window handles) the top, and all the trim. Going to hit her hard this week and hope to be more or less done by the weekend.

The things a Jensen-Healey owner gets excited about…

Finally got some news from the radiator shop. They did in fact find leaks in my gas tank! Funny that it makes me happy. Anyway, the sealing is happening now and I will be picking it up either tonight or tomorrow. It can wait a few days as I have to reassemble the doors with all the rubber parts and push fixes that arrived from Delta yesterday, and I suspect that is going to take me a while.

Still, it’s progress.

OK, I think I’m done with paint…

As long as I don’t ding things up too much putting the doors back on, anyway. Doors are curing in the garage after primer yesterday and paint today.

IMAG0131

IMAG0132

IMAG0133

Now the fun begins. Gas tank is *supposed* to be ready tomorrow. Doors are painted. Nothing holding me back from reassembly except, well, me. I am going to wait with the doors until I get my order from Delta, since there are a number of parts (gaskets, window wipes and various push fixes) that I figure will be easier to deal with with the doors still removed from the car. Hoping they arrive in the next couple of days.

Oh, and no go on the front bumper stainless. The “expert” figured once he saw it that it would be closer to $400 to $450, and he’s not even guaranteeing that it will be perfect. Delta can get a new one from England for $550. If I’m going to spend that much, I’d rather pay the extra for one that I know will be perfect. It’ll wait for now, not a huge priority.

Next weekend is looking like a distinct possibility for completion… at least the weather will be lousy all week so I won’t be looking outside thinking “wish I could take her out and drive her”, but those days will be coming soon. I now have (once I get the gas tank back) everything I need to finish, except for the JHPS club store performance exhaust system which I’ve been waiting to do till last (didn’t want to have to worry about getting paint on it). Once she’s together and verified running and driving, then the exhaust gets ordered.

Now, on to the doors.

Had a bit of a family emergency, so I’ve been lax for a week or so. Back at it.

From a paint perspective, all that’s left is the doors. As predicted: a joy to disassemble. Spent most of Saturday afternoon on them, and after about 2 1/2 hours on the drivers side door, the passenger side only took about a half hour. The big puzzle was how to remove the fixed triangle window and attached window guidetrack. I finally figured out that the easiest way was to remove the back guidetrack first so that the window pane wasn’t so tight against the front one. The rivets that hold the bottom of the triangular frame to the rest of the assembly seem to have given up the ghost on the drivers side (nothing really holding them in place) so I’ll have to address that before the reassembly. Worst case scenario is that I use the one from my doors from my parts car, but I’m trying really hard to keep those intact for future use by either myself or someone else.

Question: did Jensen have elves on the payroll to mount the door handles? Getting them removed wasn’t easy to say the least, and I am not looking forward to trying to reassemble them after the paint is done. Is there a special tool or something to loosen/tighten the bolts? Accessing everything through the opening on the interior of the door is painful to say the least.

Anyway, hit the doors good with the Zinsser paint stripper on Sunday and scraped off about 2/3 of the existing paint layers. At this point I think I’ll move on to the stripping wheel on the grinder to finish them up tonight or tomorrow (waiting for it to stop raining so I can do it outside and not add any more pink dust to the garage).

Also, now that I have officially disassembled everything there is to disassemble during this project, I called Delta with my laundry list of “stuff” that is either missing, broken, or basically useless. Mostly rubber pieces to replace the rock hard ones I removed (or broke in the process) such as the interior and exterior window wipes, the door seals, door handle gaskets, etc. and lots of push fixes for badges and trim.

My body shop friend took the front bumper stainless panel and is going to sub it out to his English wheel/metalworking expert to work out the dents. He seemed pretty confident that he could get it really close to original, and for the $150 he’s going to charge it seems well worth it as I don’t think I could replace it for that, even if I could find one in the first place.

Oh, and my gas tank should be done in the next couple of days.

I *think* I’m still on target.

Let’s start putting her back together.

So, I have this big box of parts removed during the reassembly, and it’s time to sort through and find what I need to put her back together, right? Here’s where I see how organized I was with my Ziploc bags.

110airbox
First order of business, after a cleanup and respray, was to remove the K&N filters from the Strombergs and reassemble the original airbox and filter assembly.  Used a high temp ceramic engine enamel to respray the “muffler”. It’s a little shinier than it probably should be, but it’s somewhat close to the original gray. Now, I’ve been doing some perusing of the archives here about the way it should all be put together, especially with the crankcase ventilation. What the DPO had done was to remove the factory airbox, install the two K&N pancakes, and just shove a little K&N filter into the hose coming from the crankcase and just leave it stubbed like that. From what I’ve read here, there doesn’t seem to be a whole lot of advantage to reconnecting it, so I am thinking of just leaving that is and plugging the port on the airbox that the hose is supposed to connect to. Unless someone tells me that’s a bad idea.

Then, I temporarily hung the fenders on the drivers side just to see how she looked:

107reassembly
It makes me feel better to see the fenders in place, you know?

On to the re-bolting of the front fenders. Brett wasn’t kidding about “getting everything to line up”. The front passenger side is mostly on now, though I am thinking that I am going to replace all the fasteners instead of fighting with the old ones. Hoping that tonight I can finish that, get the drivers side fender mounted too, reattach the sugar scoops, and *maybe* see about remounting the hood/bonnet. It all has to be done, and it will do my heart good to see the front end complete.

Still haven’t heard from the radiator shop, so no idea when I’ll have my gas tank back. Getting anxious.

Stopped painting so I could umm… stop the car.

Another milestone, got the rotors and drums replaced. New rear brake hose. New pads and shoes. All bled out and the brakes *seem* to be good now (can’t exactly take her out to road test her right now but the pedal is nice and firm).

I’ll be curious to see if I got my pressure differential switch recentered as part of this… my brake warning light has been on for over a year.

On to the reassembly of the body!